
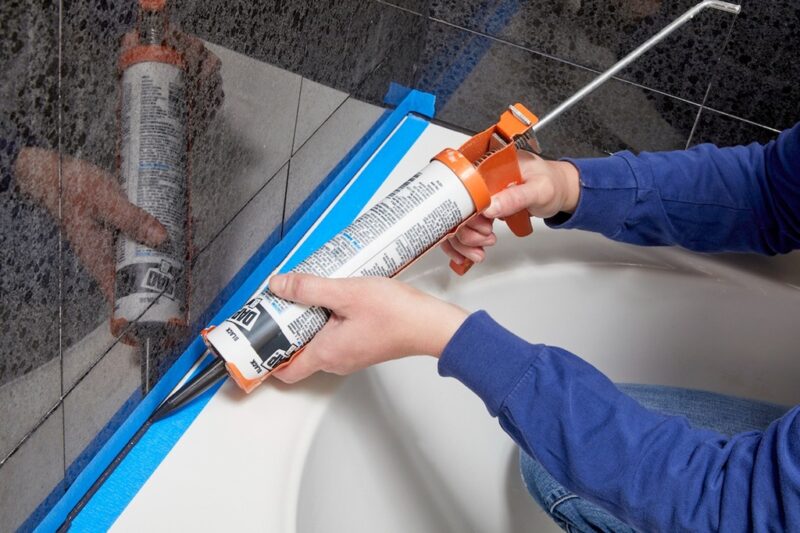
Caulk typically requires 2 to 24 hours to dry before painting, depending on the type used. Latex caulk dries within 2 to 4 hours, making it ideal for quick projects. Silicone caulk needs 24 to 48 hours for complete curing. Acrylic latex caulk offers a middle ground at 4 to 6 hours. The drying time affects paint adhesion, finish quality, and long-term durability of your work.
Understanding proper drying times prevents common mistakes like cracking, peeling, or uneven paint coverage. Temperature, humidity, and ventilation significantly impact how quickly caulk becomes ready for paint. Most professionals recommend waiting beyond the minimum dry time for best results, especially in high-moisture areas like bathrooms and kitchens.
Knowing how long does caulk take to dry before painting saves time and ensures professional-looking results. This guide walks through each caulk type, environmental factors, and testing methods to determine readiness. Whether you’re sealing baseboards, windows, or crown molding, proper timing makes all the difference between a flawless finish and a frustrating do-over.
What Factors Determine How Long Caulk Takes to Dry Before Painting?
Several environmental and product-related factors control caulk drying time. Temperature ranks as the most critical element, with ideal conditions between 60°F and 80°F. Colder temperatures slow down the chemical reactions needed for curing, while excessive heat can cause surface skinning before internal drying completes.
Humidity levels directly affect water-based caulks. High humidity extends drying time because moisture in the air prevents water from evaporating from the caulk. Conversely, extremely low humidity might cause surface cracking as the outer layer dries too quickly compared to the interior.
Ventilation and air circulation speed up the drying process by moving moisture away from the caulked surface. Poor airflow traps humidity around the caulk, significantly extending wait times. Opening windows or using fans creates better drying conditions without compromising the cure.
Bead thickness matters more than most people realize. A thin, properly applied bead dries faster than a thick, uneven application. Excess caulk not only wastes product but can take days longer to fully cure, even if the surface feels dry to touch.
The substrate material also plays a role. Porous surfaces like wood and drywall absorb some moisture from the caulk, potentially speeding drying. Non-porous materials like metal or glass keep all moisture within the caulk, requiring longer wait times.
How Long Does Latex Caulk Take to Dry Before Painting?
Latex caulk represents the fastest-drying option for most painting projects. Under normal conditions, it becomes dry to the touch within 30 minutes to 2 hours. However, this surface dryness doesn’t mean it’s ready for paint application.
For painting purposes, wait at least 2 to 4 hours after applying latex caulk. This timeframe allows sufficient moisture evaporation while maintaining flexibility. Rushing this process results in paint that doesn’t bond properly, leading to cracking along the caulk line.
Professional painters often extend this window to 6 hours when working on important projects. The extra time guarantees complete surface curing and reduces the risk of paint-related failures. This approach proves especially valuable for trim work and detailed applications where quality matters most.
Weather conditions modify these timeframes. On humid days, add 2 to 4 additional hours to your waiting period. Cold temperatures below 50°F can double the required drying time, making overnight waiting the safest choice.
Acrylic latex caulk, a popular hybrid formula, requires slightly longer than pure latex. Plan for 4 to 6 hours minimum before applying primer or paint. This type offers better flexibility and durability, justifying the modest increase in wait time.
How Long Does Silicone Caulk Need Before You Can Paint It?
Silicone caulk presents unique challenges for painting projects. Most pure silicone formulas are not paintable at all, regardless of drying time. Paint simply doesn’t adhere to silicone’s slick, water-repellent surface.
For paintable silicone blends, expect to wait 24 to 48 hours before applying paint. These modified formulas contain additives that improve paint adhesion but still require extensive curing time. The longer wait ensures the silicone fully cross-links and develops its final surface properties.
Many professionals avoid silicone entirely for projects requiring painting. The extended drying time and adhesion concerns make latex or acrylic latex better choices. However, silicone excels in wet areas where painting isn’t needed, such as shower enclosures and aquarium seals.
If you must paint over silicone-based caulk, check the product label carefully. Look for terms like “paintable silicone” or “acrylic-silicone hybrid.” Even then, test a small area first to verify paint adhesion before committing to the entire project.
Temperature affects silicone curing more dramatically than other types. In cool conditions below 60°F, extend your wait time to 72 hours or more. The chemical curing process slows considerably, and premature painting causes adhesion failures.
What Is the Difference Between Dry Time and Cure Time for Caulk?
Dry time and cure time represent two distinct phases in caulk hardening. Understanding this difference prevents premature painting and ensures lasting results. Many people confuse these terms, leading to timing mistakes that compromise their work.
Dry time refers to surface drying when the caulk feels dry to gentle touch. This typically occurs within hours and allows light handling without leaving fingerprints. However, the interior remains soft and continues releasing moisture.
Cure time represents complete hardening throughout the entire bead. Full curing develops maximum strength, flexibility, and water resistance. This process takes significantly longer than surface drying, often requiring several days to complete.
For painting purposes, you need something between these extremes. The caulk must be dry enough to accept paint without absorbing it, but doesn’t need complete curing. This “paint-ready” stage varies by product but generally falls closer to dry time than full cure time.
Manufacturer recommendations typically specify this paint-ready window. Following these guidelines provides the best balance between project speed and finish quality. Ignoring cure time requirements leads to common problems like paint cracking, shrinkage gaps, and adhesion failures.
Common Timing Mistakes to Avoid
- Painting immediately after the caulk stops feeling wet creates adhesion problems and uneven coverage
- Waiting too long between caulking and painting allows dust and contaminants to settle on the surface
- Applying thick beads that require exponentially longer drying times than recommended
- Skipping climate considerations when planning project timelines
- Mixing different caulk types in one project without accounting for varying dry times
How Can You Tell When Caulk Is Ready for Painting?
Several reliable methods help determine when caulk reaches paint-ready condition. Visual inspection provides the first clue. Fresh caulk appears glossy or wet, while dry caulk develops a matte finish without shine. Color changes also occur, with most caulks lightening slightly as they dry.
The touch test offers a simple verification method. Gently press your finger against the caulk in an inconspicuous area. If it feels tacky, sticky, or leaves residue on your finger, wait longer. Properly dried caulk feels firm but slightly flexible without any transfer.
Check for shrinkage along the caulk line. Fresh caulk often appears slightly raised or rounded. As it dries, it settles and may develop a slight concave profile. This settling indicates moisture loss and progression toward paint-ready condition.
Temperature testing works particularly well in uncertain conditions. Touch the caulk with the back of your hand. If it feels cooler than the surrounding surface, evaporation continues and more drying time is needed. Equal temperature suggests readiness for the next step.
Professional contractors often use the “scratch test” for critical projects. Using a fingernail or plastic tool, lightly scratch the surface in a hidden spot. If material balls up or smears, the caulk needs more time. A clean scratch line indicates sufficient surface curing for painting.
Does Temperature and Humidity Affect Caulk Drying Time Before Painting?
Temperature and humidity dramatically alter caulk drying schedules. These environmental factors can double or triple standard wait times, making weather awareness crucial for project planning. Understanding their effects helps you adjust expectations and avoid timing mistakes.
Ideal temperature range sits between 60°F and 80°F for most caulk types. Within this zone, manufacturer-stated dry times prove accurate. Below 50°F, chemical reactions slow significantly, and some caulks may not cure properly at all. Above 90°F, rapid surface drying can trap moisture inside, causing future adhesion problems.
Humidity levels between 40% and 60% provide optimal drying conditions. Higher humidity extends drying time by preventing moisture evaporation from water-based caulks. In humid climates, adding 50% to 100% more time to standard recommendations ensures proper curing.
Winter projects present unique challenges. Cold surfaces conduct heat away from caulk, slowing the curing process. Heating the work area helps, but avoid pointing heat sources directly at fresh caulk, which can cause uneven drying and cracking.
Summer humidity requires patience and planning. Morning applications in air-conditioned spaces dry faster than afternoon work in humid conditions. Consider using dehumidifiers in enclosed spaces to create better drying environments.
Seasonal Timing Guidelines
| Season | Typical Conditions | Recommended Wait Time Adjustment |
|---|---|---|
| Spring | Moderate temperature, variable humidity | Add 1-2 hours to standard time |
| Summer | High temperature, high humidity | Add 2-4 hours in humid regions |
| Fall | Cooling temperatures, moderate humidity | Add 1-2 hours, more for cold snaps |
| Winter | Low temperature, low humidity | Add 4-8 hours or wait overnight |
What Type of Paint Works Best Over Freshly Dried Caulk?
Paint selection significantly impacts results when working over caulk. Latex or acrylic latex paint provides the best compatibility with most caulk types. These water-based formulas flex with the caulk, preventing cracking and maintaining seal integrity over time.
Oil-based paints work over caulk but require longer caulk curing times. Wait at least 24 hours before applying oil-based products, regardless of caulk type. The solvents in oil-based paint can soften insufficiently cured caulk, causing adhesion problems and finish defects.
Primer application before painting offers several advantages. A quality primer improves paint adhesion, ensures uniform color coverage, and can reduce the number of topcoat applications needed. However, primer still requires properly dried caulk underneath for best results.
Elastomeric paints represent an excellent choice for exterior applications over caulk. Their flexible nature accommodates the natural expansion and contraction of caulk joints. This compatibility extends the life of both the paint and the seal.
Avoid using spray paint over freshly applied caulk unless you’ve allowed extra drying time. The propellant and solvents in spray formulas can react with uncured caulk, causing bubbling or adhesion failures. When spraying is necessary, wait at least twice the recommended dry time for brush application.
Should You Use Primer Before Painting Over Caulk?
Primer application over caulk depends on several project-specific factors. For new construction or bare surfaces, primer proves essential regardless of caulk presence. It creates a uniform base that ensures consistent paint appearance across different materials.
When caulking matches your paint color closely, you might skip primer on small repairs. However, white caulk under dark paint or vice versa definitely requires primer for proper coverage. Plan for two primer coats when dealing with strong color contrasts.
Stain-blocking primers become necessary when caulking over stained or damaged areas. These specialized products prevent tannin bleed-through and other discoloration that might show through topcoats. They also improve adhesion on challenging surfaces.
Professional results almost always involve primer application. The modest additional cost and time investment pay dividends in finish quality and longevity. Primer fills minor imperfections and creates better paint flow characteristics.
Even when primer seems optional, consider it insurance against future problems. Paint adheres better to primed caulk, reducing the likelihood of peeling along joints. This advantage becomes particularly important in high-traffic areas and moisture-prone locations.
How Do You Speed Up Caulk Drying Time Before Painting?
Several safe methods accelerate caulk drying without compromising quality. Improving ventilation tops the list of effective techniques. Opening windows, running fans, or using air conditioning increases air circulation and removes moisture-laden air from around the caulk.
Dehumidifiers work exceptionally well in enclosed spaces. By removing moisture from the air, they create conditions that allow faster water evaporation from the caulk. This method proves particularly valuable during humid summer months or in naturally damp spaces like basements.
Gentle heat application can reduce drying time when done correctly. Space heaters positioned several feet away from the work area raise ambient temperature without directly heating the caulk. Never use heat guns or hair dryers on fresh caulk, as concentrated heat causes surface skinning while leaving the interior wet.
Applying thinner beads inherently dries faster than thick applications. Use proper caulking technique to create the smallest effective bead size. This approach not only speeds drying but also reduces material waste and creates cleaner finished joints.
Quick-dry caulk formulas offer legitimate time savings for rush projects. These specialized products contain additives that accelerate the curing process. However, they typically cost more and may sacrifice some flexibility compared to standard formulas.
Methods to Avoid
- Direct heat application from heat guns or hair dryers causes uneven curing and cracking
- Excessive ventilation from high-speed fans can create dust contamination on the caulk surface
- Chemical drying agents not specifically designed for caulk may damage the seal
- Extremely low humidity environments can cause rapid surface drying with interior moisture retention
What Happens If You Paint Over Wet or Uncured Caulk?
Painting over insufficiently dried caulk creates multiple problems that compromise your work. Paint adhesion failures represent the most common issue. The paint doesn’t bond properly to the wet surface, leading to peeling along the caulk line within days or weeks.
Cracking develops as the caulk continues shrinking beneath the paint layer. This shrinkage occurs as trapped moisture slowly escapes, creating stress on the paint film. The result appears as fine cracks following the caulk line, requiring complete removal and reapplication.
Paint absorption into wet caulk causes discoloration and uneven finish. The caulk draws in paint pigments irregularly, creating darker spots or streaks. Additional paint coats rarely correct this problem, as the underlying issue persists.
Bubbling or blistering occurs when solvents in paint react with uncured caulk. Gas bubbles form beneath the paint film as trapped moisture tries to escape. These blisters eventually rupture, leaving crater-like defects that mar the finish.
Extended drying time becomes necessary when paint is applied prematurely. The paint layer slows moisture escape from the caulk, dramatically extending the total cure time. What might have taken hours now requires days to fully harden.
Can You Paint Immediately After Caulking in Emergency Situations?
True emergencies requiring immediate painting over caulk are rare, but certain products address these situations. Rapid-cure caulks specifically designed for quick painting offer legitimate solutions. These formulas contain accelerators that enable paint application within 30 minutes to 1 hour.
However, even fast-curing products come with compromises. They typically cost significantly more than standard caulks and may offer reduced flexibility or shorter lifespan. Evaluate whether your situation genuinely requires these specialty products or if standard materials with proper drying time would serve better.
In actual emergencies, consider alternative approaches. Painting everything except the freshly caulked areas allows the project to progress while the caulk dries. Return later to paint the caulk after sufficient drying time has elapsed.
Temporary color-matched caulk provides another option. Some manufacturers offer pre-colored caulks that match common paint colors. While these still require drying time before topcoat application, they look acceptable temporarily if project completion is urgent.
Realistic assessment often reveals that perceived emergencies are actually deadline pressures that better planning could have avoided. For professional results, plan projects to accommodate proper drying times rather than seeking workarounds that compromise quality.
Step-by-Step Guide: Proper Caulking and Painting Timeline

Following a systematic approach ensures optimal results when caulking before painting. This timeline accommodates standard latex caulk in normal conditions. Adjust timeframes based on your specific caulk type and environmental factors.
Begin with thorough surface preparation. Clean the area to remove dust, dirt, and loose paint. Allow cleaned surfaces to dry completely before caulking. This preparation phase affects long-term adhesion as much as proper drying time.
Apply caulk using consistent pressure and speed for uniform bead size. Tool the caulk immediately after application, smoothing it into the joint. Remove masking tape while the caulk remains wet for cleanest lines.
Wait the manufacturer-recommended minimum dry time before proceeding. For latex caulk, this typically means 2 to 4 hours under normal conditions. Check the product label for specific guidance, as formulas vary between manufacturers.
Perform the touch test before painting. The caulk should feel firm and dry without tackiness. If any doubt remains, wait another hour and test again. Patience at this stage prevents multiple problems later.
Apply primer if required for your project. Many professionals prefer priming the entire surface, including caulked areas, for uniform appearance. Allow primer to dry according to its specifications before topcoat application.
Paint using thin, even coats rather than one heavy application. Multiple thin coats provide better coverage and reduce the chance of caulk rehydration from excessive paint moisture. Allow proper drying time between coats as specified on the paint can.
Where Can You Find More Expert Advice on Home Maintenance Projects?
Reliable information sources help homeowners make informed decisions about caulking and painting projects. The Family Handyman website offers extensive articles and videos covering proper caulking techniques and timing considerations. Their expert-written content addresses common mistakes and provides practical solutions.
For comprehensive home improvement guidance, Homeplanidea serves as an excellent resource covering various maintenance topics. The site features detailed guides on everything from minor repairs to major renovations, helping homeowners tackle projects with confidence.
Manufacturer websites provide product-specific information that generic guides cannot match. Companies like DAP, GE, and Red Devil maintain detailed technical data sheets specifying exact drying times, temperature requirements, and compatibility information for their caulk products.
Professional painter associations offer workshops and certification programs that include proper caulking procedures. While primarily for professionals, their published standards and best practices help homeowners understand quality work expectations.
Read More Also: Repair a Garage Door Panel With Aluminum Siding
Conclusion
Understanding how long caulk takes to dry before painting ensures professional-quality results in your home improvement projects. Latex caulk requires 2 to 4 hours, silicone-based products need 24 to 48 hours, and acrylic latex falls somewhere between at 4 to 6 hours. These timeframes vary based on temperature, humidity, ventilation, and bead thickness.
Patience during the drying phase prevents common problems like cracking, peeling, and poor adhesion. Testing the caulk before painting using visual inspection and touch tests provides confidence that your work will last. Environmental factors play crucial roles in drying speed, requiring adjustments to standard recommendations during extreme weather.
Success comes from proper planning, quality materials, and respecting the curing process. Whether tackling a small repair or a whole-house painting project, allowing adequate drying time between caulking and painting protects your investment of time and money. Start your next caulking project with confidence, knowing exactly when to pick up that paintbrush for flawless, long-lasting results.
Frequently Asked Questions
Can I paint over 100% silicone caulk?
No, paint does not adhere to pure silicone caulk regardless of drying time. The silicone’s water-repellent surface prevents paint bonding. Use paintable silicone blends or acrylic latex caulk instead for areas requiring paint coverage. If you accidentally used pure silicone, you must remove it completely and reapply with a paintable product.
How long should I wait to paint caulk in a bathroom?
Wait at least 24 hours before painting caulk in bathrooms due to higher humidity levels. Moisture-rich environments significantly slow drying times for all caulk types. For best results, ensure adequate ventilation during the drying period and consider using a bathroom fan to reduce humidity. Acrylic latex caulk works well for bathroom applications requiring paint.
What is the best caulk for painting projects?
Acrylic latex caulk offers the best balance of paintability, flexibility, and drying speed for most painting projects. It accepts paint well, remains flexible after curing, and typically becomes paint-ready within 4 to 6 hours. Look for products labeled “paintable” and “flexible” for optimal results. Avoid pure silicone for any surface requiring paint coverage.
Why is my paint cracking along the caulk line?
Paint cracking along caulk lines typically results from painting too soon before adequate drying. The caulk continues shrinking as it dries beneath the paint, stressing the paint film until it cracks. Other causes include using non-flexible caulk in areas requiring movement accommodation, or applying paint too thickly. Remove cracked sections and reapply caulk with proper drying time.
Can I use a hair dryer to speed up caulk drying?
Avoid using hair dryers or heat guns on fresh caulk. Direct heat causes rapid surface drying while leaving the interior wet, resulting in cracking and poor paint adhesion. Instead, improve room ventilation, use a dehumidifier, or gently raise ambient temperature with a space heater positioned away from the work area. Natural drying produces superior results.
How do I know if my caulk is paintable?
Check the product label for terms like “paintable,” “paint-ready,” or “accepts paint.” Most latex and acrylic latex caulks are paintable, while pure silicone caulks are not. If the label doesn’t specify, test on a small inconspicuous area by applying paint after the recommended dry time. Good paint adhesion confirms paintability.
Should exterior caulk dry longer than interior caulk before painting?
Yes, exterior caulk benefits from extended drying time due to exposure to temperature fluctuations and moisture. Wait at least 6 to 8 hours for exterior latex caulk, even if interior dry time is shorter. Weather conditions significantly impact exterior drying, so choose mild, dry days for exterior caulking projects. Consider overnight drying for best results on exterior applications.
