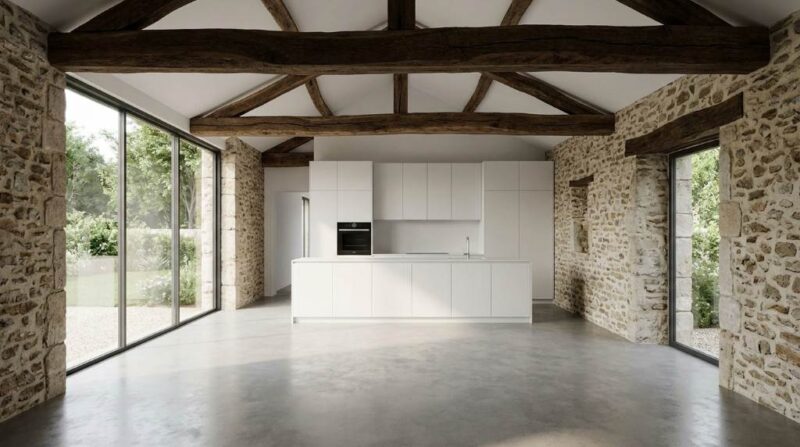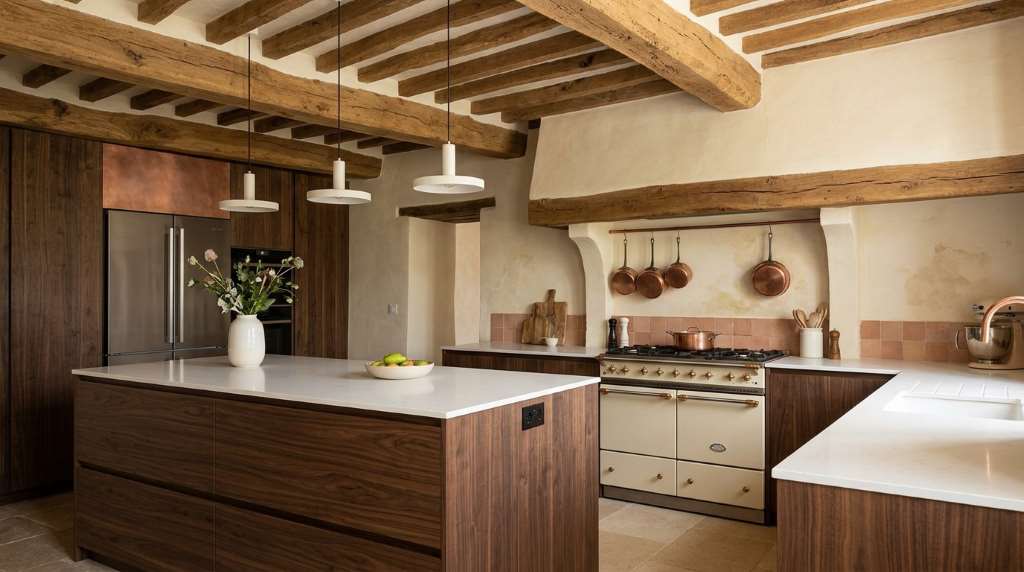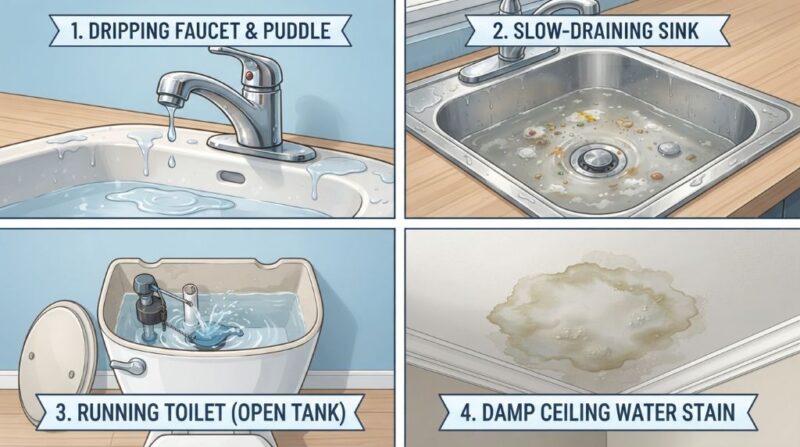

The Difference Between Renovation and Restoration

The difference between renovation and restoration is simple

The difference between renovation and restoration is simple. Renovation improves or updates a property, while restoration returns it to its original condition. Although both improve buildings, they follow different goals, methods, and outcomes.

Many property owners confuse these terms because both involve construction work. However, choosing the right approach affects cost, design flexibility, historical value, and long term satisfaction.

Recent housing studies show that remodeling and improvement projects remain among the most common property investments. Additionally, historic property preservation continues growing as owners recognize the value of authentic architectural features. Understanding renovation and restoration helps you make smarter decisions before starting any project.

Understanding Renovation

Renovation focuses on improving a space through updates and modern enhancements. The goal is better function, comfort, appearance, or efficiency.

Unlike restoration, renovation does not prioritize historical accuracy. Instead, it allows owners to adapt spaces to current lifestyles and preferences.

What Happens During a Renovation?

A renovation project may include several changes:

  • Replacing outdated flooring
  • Installing modern cabinets
  • Updating bathrooms
  • Improving lighting systems
  • Expanding living spaces
  • Adding smart home features
  • Upgrading insulation and windows

Because renovation emphasizes improvement, owners often enjoy greater design freedom. As a result, the finished space may look completely different from the original structure.

Common Reasons People Renovate

Many homeowners renovate to increase functionality. Older layouts often fail to meet modern living needs.

Others renovate to improve property value. Updated kitchens and bathrooms frequently attract buyers and support stronger resale prices.

Furthermore, energy efficiency motivates many projects. New materials and systems often reduce utility costs while improving comfort.

Understanding Restoration

Restoration focuses on preserving and returning a building to its original appearance. The primary goal is authenticity rather than modernization.

Instead of replacing historic features with modern alternatives, restoration attempts to repair and preserve existing elements. Therefore, original craftsmanship remains visible and protected.

What Happens During a Restoration?

Restoration work may involve:

  • Repairing original woodwork
  • Preserving historic windows
  • Recreating period details
  • Restoring original paint colors
  • Repairing architectural ornaments
  • Maintaining historical materials
  • Rebuilding damaged historic features

Consequently, the building retains its original character while regaining structural integrity and visual appeal.

Why Property Owners Choose Restoration

Historic significance often drives restoration projects. Owners want to preserve architectural heritage for future generations.

Additionally, some neighborhoods or districts require preservation standards. In these cases, restoration helps maintain community character and regulatory compliance.

Many owners also appreciate authentic craftsmanship. Older buildings frequently contain details that are difficult or expensive to reproduce today.
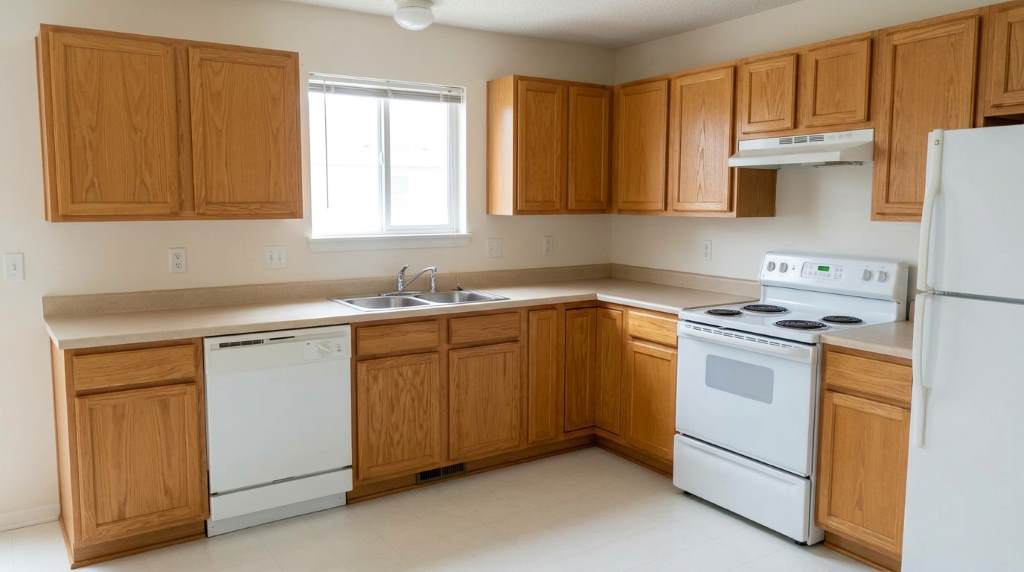
The Core Difference Between Renovation and Restoration

The Core Difference Between Renovation and Restoration

The most important distinction involves purpose. Renovation changes a building to meet current needs, while restoration returns it to a previous state.

Although both improve properties, their priorities differ significantly. Understanding these priorities prevents costly mistakes and unrealistic expectations.

Renovation Prioritizes Improvement

A renovation project asks one key question. How can this property work better today?

Because of this mindset, owners often replace outdated materials and redesign spaces. Modern performance takes priority over historical preservation.

Restoration Prioritizes Preservation

A restoration project asks a different question. How can this property regain its original appearance?

Therefore, existing materials receive careful attention. Preservation and historical accuracy guide every major decision.

Comparing Renovation and Restoration

Project Goals

Renovation seeks modernization and improved usability. Restoration seeks historical accuracy and preservation.

As a result, project planning differs from the beginning. Every decision reflects the intended outcome.

Design Flexibility

Renovation provides substantial creative freedom. Owners can alter layouts, finishes, and architectural details.

Restoration offers less flexibility because original features remain central. Consequently, major design changes are usually discouraged.

Materials Used

Renovation often incorporates modern products and technologies. New materials typically improve durability and performance.

Restoration generally requires historically appropriate materials. Therefore, sourcing products can become more challenging and specialized.

Cost Considerations

Project costs vary significantly depending on scope. Neither approach is automatically cheaper.

Renovation can become expensive when major structural changes occur. Meanwhile, restoration may require specialized craftsmanship and rare materials.

Timeline Differences

Renovation timelines often depend on design complexity and construction scope. Many projects follow predictable schedules.

Restoration frequently involves research and careful preservation work. Consequently, timelines may extend beyond initial expectations.

When Renovation Makes More Sense

Not every building benefits from restoration. In many situations, renovation delivers greater practical value.

Consider renovation when:

  • Functionality is the primary concern
  • The property lacks historical significance
  • Major layout changes are necessary
  • Energy efficiency improvements are priorities
  • Modern living requirements drive decisions

Additionally, renovation works well when existing features have little architectural value. In such cases, modernization often creates better long term results.

Example of a Renovation Project

Imagine a house built decades ago with small rooms and outdated systems. The owner removes walls, installs efficient windows, and upgrades electrical wiring.

The finished home functions better for modern living. Although the original layout changes significantly, overall usability improves dramatically.

When Restoration Is the Better Choice

Restoration becomes valuable when preserving history matters. Certain properties deserve protection because of their architectural or cultural importance.

Choose restoration when:

  • Historic character remains intact
  • Original details have significant value
  • Preservation regulations apply
  • Architectural authenticity matters
  • Long term heritage preservation is important

Furthermore, restoration often enhances the uniqueness of a property. Authentic features frequently create character that modern construction cannot replicate.

Example of a Restoration Project

Consider a century old home containing original moldings and handcrafted woodwork. Instead of replacing these features, specialists repair and preserve them.

The finished property reflects its original design vision. Consequently, historical value remains protected while structural issues are resolved.

Can a Project Include Both Renovation and Restoration?

Yes, many successful projects combine both approaches. In fact, mixed strategies are increasingly common.

Owners often restore historically significant features while renovating less important areas. This balance preserves character without sacrificing comfort.

How Hybrid Projects Work

A homeowner might restore original exterior details. Meanwhile, they renovate kitchens, bathrooms, and mechanical systems.

As a result, the property maintains historical charm while supporting contemporary lifestyles. This approach often delivers the best balance between preservation and practicality.

Key Questions to Ask Before Choosing

Before starting work, evaluate your property’s goals carefully. Clear answers simplify decision making.

Ask yourself:

  • Does the building have historical importance?
  • Are original features worth preserving?
  • What is the available budget?
  • How important is modern functionality?
  • What outcome do you want long term?

Moreover, consulting experienced professionals helps identify opportunities and limitations. Expert guidance often prevents expensive mistakes later.

Mistakes Property Owners Commonly Make

Many owners begin projects without defining objectives clearly. Consequently, costs increase and expectations become difficult to manage.

Another common mistake involves removing original features too quickly. Once historic elements disappear, restoring authenticity becomes much harder.

Some owners also underestimate restoration complexity. Specialized labor and materials often require additional planning and patience.

Therefore, careful assessment before construction begins remains essential. A clear strategy saves time, money, and frustration.

How Property Value Can Be Affected

Both approaches can increase property value when executed properly. However, the impact depends on location and buyer expectations.

Renovation often attracts buyers seeking convenience and modern amenities. Updated systems and layouts frequently improve market appeal.

Restoration can attract buyers who appreciate historical authenticity. Unique architectural details often create strong emotional connections.

Consequently, understanding local market preferences helps determine which strategy offers greater financial benefits.

Conclusion

The difference between renovation and restoration comes down to purpose. Renovation improves and modernizes a property, while restoration preserves and revives its original character.

Before beginning any project, identify your goals, budget, and property characteristics. Then work with qualified professionals who understand the chosen approach. A thoughtful decision today can protect value, enhance enjoyment, and deliver better results for years to come.

FAQs

Is restoration more expensive than renovation?

Not always, because costs depend on materials, labor requirements, and project complexity.

Does renovation remove original features?

Yes, renovation may replace or alter original elements when modernization is the goal.

Can historic homes be renovated?

Yes, although preservation rules may limit certain modifications.

Which option increases property value more?

Both can increase value when aligned with buyer expectations and property characteristics.

Can I restore and renovate the same property?

Yes, many projects successfully combine restoration and renovation strategies.
Small Space, Big Impact: Design Mistakes Are Holding Home Back

Every design choice affects how people experience a room

Small homes rarely feel cramped because of size alone. Most spaces feel smaller because common design mistakes reduce function, visual balance, and comfort. By correcting furniture placement, lighting choices, storage habits, and layout decisions, you can create a home that feels larger, brighter, and more inviting without adding square footage.

Recent housing trends show that smaller homes and apartments remain increasingly common. Meanwhile, many homeowners prioritize multifunctional living areas and efficient storage solutions. However, maximizing a compact home requires more than buying smaller furniture. Thoughtful design decisions can dramatically improve how a space looks, feels, and performs every day.

Why Small Design Mistakes Create Big Problems

Every design choice affects how people experience a room. Even minor errors can make spaces feel crowded and uncomfortable.

Moreover, compact homes have less margin for error. Therefore, poor layout decisions become more noticeable and impactful.

When multiple mistakes occur simultaneously, rooms often appear darker and smaller. As a result, homeowners may assume they simply need more space.

In reality, many homes already have enough square footage. Instead, they need smarter design strategies and better organization.

The Mistake of Choosing Furniture That Is Too Large

Large furniture often overwhelms compact rooms. Consequently, movement becomes difficult and visual balance disappears.

Many homeowners focus on comfort alone during furniture shopping. However, scale matters just as much as functionality.

Signs Your Furniture Is Too Big

Several indicators reveal oversized furniture problems:

: Walkways feel narrow or blocked
: Doors cannot open fully
: Multiple pieces touch each other
: The room feels crowded despite limited décor
: Natural movement becomes difficult

Instead of maximizing seating capacity, prioritize circulation. Therefore, every room will feel more open and comfortable.

Vertical storage creates room without increasing clutter

A Better Approach

Choose furniture proportional to room dimensions. Additionally, consider pieces with visible legs because they create visual openness.

Multifunctional furniture also works exceptionally well. For example, storage ottomans and expandable tables save valuable space.

Ignoring Vertical Space

Many homeowners focus exclusively on floor space. Meanwhile, valuable wall space remains completely unused.

Vertical storage creates room without increasing clutter. Furthermore, it draws the eye upward and enhances perceived height.

Bookshelves, wall mounted cabinets, and floating shelves offer practical solutions. Consequently, rooms gain storage while maintaining open floor areas.

Decorative wall organization also improves functionality. Therefore, small homes can support more belongings without feeling overcrowded.

Poor Lighting Choices

Lighting influences mood, functionality, and perceived size. Yet many compact homes rely on a single overhead fixture.

Unfortunately, one light source creates shadows and visual imbalance. As a result, rooms often appear smaller than they actually are.

Common Lighting Errors

Several lighting mistakes frequently affect small homes:

: Using only ceiling lighting
: Blocking windows with heavy coverings
: Choosing dim bulbs
: Ignoring task lighting
: Creating dark corners

Layered lighting solves many of these problems. Therefore, combine ambient, task, and accent lighting whenever possible.

Maximizing Natural Light

Natural light makes any room feel larger. Consequently, homeowners should remove obstacles that limit daylight.

Light window treatments often work better than heavy drapes. Additionally, strategically placed mirrors help reflect sunlight throughout the room.

Pushing All Furniture Against Walls

Many people assume wall placement creates more space. However, this strategy often produces awkward layouts.

Furniture pressed tightly against walls can make rooms feel disconnected. Instead, intentional groupings create better flow and comfort.

Even a few inches of separation can improve visual balance. Therefore, experiment with different arrangements before settling on one layout.

Conversation areas benefit especially from thoughtful positioning. As a result, rooms feel more welcoming and functional.

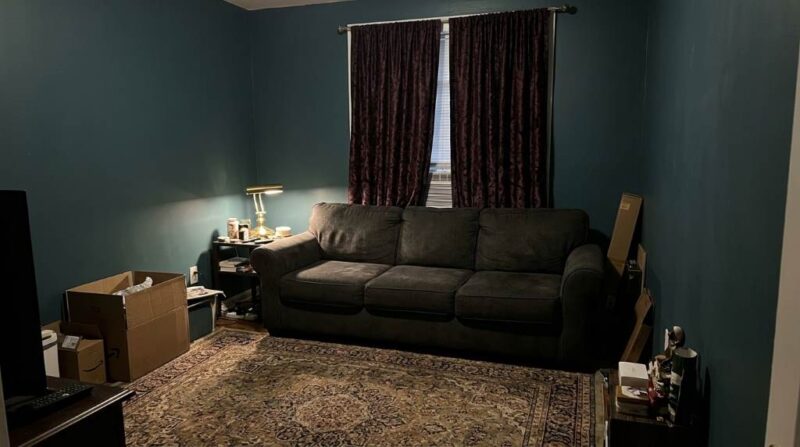
Overusing Dark Colors

Dark colors can create sophistication and depth. However, excessive darkness may overwhelm small interiors.

When walls, furniture, and décor share dark tones, rooms absorb light. Consequently, spaces often feel enclosed and smaller.

This does not mean avoiding dark colors entirely. Instead, use them strategically alongside lighter elements.

Balanced contrast creates visual interest and dimension. Therefore, homeowners can enjoy bold design without sacrificing openness.

Neglecting Storage Planning

Clutter remains one of the fastest ways to shrink a room visually. Even attractive décor loses impact when surrounded by disorder.

Unfortunately, many homes lack intentional storage systems. Therefore, everyday items accumulate on visible surfaces.

Storage Strategies That Work

Consider these practical solutions:

: Under bed storage containers
: Built in shelving
: Entryway storage benches
: Hidden cabinet organizers
: Wall mounted storage systems

Smart storage reduces visual noise. As a result, rooms appear larger and more organized.

The Importance of Daily Accessibility

Storage should remain convenient and easy to access. Otherwise, clutter quickly returns despite good intentions.

Frequently used items deserve designated locations. Consequently, maintaining organization becomes much easier.

Decorating Every Available Surface

Decorative objects add personality and warmth. However, excessive decoration often creates visual chaos.

Many homeowners fill every shelf, table, and countertop. Unfortunately, this eliminates visual breathing room.

Empty space plays an important design role. Therefore, leave some surfaces intentionally clear.

Selective decoration creates stronger impact. As a result, individual pieces receive more attention and appreciation.

Choosing the Wrong Rug Size

Rugs influence room proportions more than many people realize. Yet incorrect sizing remains extremely common.

Small rugs often make rooms appear fragmented. Consequently, furniture arrangements feel disconnected and awkward.

Larger rugs usually perform better in compact spaces. Furthermore, they help unify different functional areas.

When possible, allow major furniture pieces to connect with the rug. Therefore, the room feels cohesive and balanced.

Forgetting About Traffic Flow

A beautiful room still fails if movement feels difficult. Therefore, traffic flow should guide every design decision.

People need comfortable pathways through living areas. Otherwise, rooms become frustrating despite attractive appearances.

Before adding new furniture, evaluate movement patterns carefully. Consequently, everyday activities remain smooth and convenient.

Functional layouts improve both comfort and aesthetics. As a result, homes feel more spacious and welcoming.

Using Too Many Design Styles

Mixing styles can create personality and uniqueness. However, excessive variation often causes visual confusion.

A room combining numerous unrelated themes lacks cohesion. Therefore, the space feels busier than necessary.

Instead, establish a primary design direction. Then introduce complementary accents thoughtfully and consistently.

Visual harmony supports a sense of openness. Consequently, rooms appear calmer and more intentional.

Ignoring Scale in Accessories

Accessories should complement furniture rather than compete with it. Unfortunately, scale mismatches occur frequently.

Tiny artwork often disappears on large walls. Meanwhile, oversized accessories can overwhelm compact rooms.

Balance remains essential throughout the design process. Therefore, evaluate each decorative element within the broader context.

Thoughtful proportions create a polished appearance. As a result, spaces feel professionally designed and visually comfortable.

Creating Functional Zones in Small Homes

Modern homes often serve multiple purposes simultaneously. Therefore, clear zoning improves organization and usability.

A single room may function as an office, dining area, and lounge. Consequently, boundaries become increasingly important.

Effective Zoning Techniques

Several methods help define separate areas:

: Area rugs
: Lighting variations
: Furniture placement
: Open shelving
: Color distinctions

These strategies create structure without walls. Therefore, spaces remain open while supporting different activities.

Small Changes That Deliver Immediate Results

Many homeowners believe major renovations are necessary. However, simple adjustments often create significant improvements.

Rearranging furniture can transform a room within hours. Similarly, decluttering immediately increases perceived space.

Improved lighting delivers another fast upgrade. Furthermore, adding vertical storage creates long term benefits.

When multiple small improvements work together, results become surprisingly dramatic. Consequently, homes feel larger and more enjoyable.

Conclusion

Small homes do not need more square footage to make a strong impression. Instead, they need thoughtful design decisions that maximize function, light, storage, and visual balance.

Review your home room by room and identify the mistakes discussed above. Then make one improvement at a time and measure the difference. With the right approach, even the smallest space can deliver exceptional comfort, style, and practicality.

FAQs

What is the biggest mistake in a small home?

Oversized furniture is often the most common mistake because it restricts movement and visual openness.

Do light colors always make rooms look bigger?

Light colors generally help reflect light and create a more spacious appearance.

How can I add storage without adding clutter?

Use vertical storage, hidden compartments, and multifunctional furniture to increase organization.

Should furniture always touch the walls in small rooms?

No, strategic spacing often improves balance and makes rooms feel more inviting.

Can mirrors really make a room feel larger?

Yes, mirrors reflect light and views, which increases the perception of space.

Blending Old World Charm With Contemporary Design

combining styles, identify which traditional features deserve preservation

Contemporary design works best when it pairs classic architectural details with clean, modern functionality instead of copying one style completely. Focus on natural materials, balanced proportions, and thoughtful contrast because those choices create a timeless home that feels warm every day. More than 80% of homeowners rank comfort among their highest priorities, while many remodeling projects recover around 70% of their value through lasting design choices.

Why This Style Feels Timeless

Old World interiors carry history through texture, craftsmanship, and carefully aged materials that invite people into comfortable everyday living. Contemporary design brings simplicity, practical layouts, and efficient features that support modern routines without unnecessary visual noise.

Together, these approaches create rooms that feel elegant without becoming overly formal or outdated as design trends change. Instead of competing, each style highlights the strengths that the other naturally lacks through balanced visual relationships.

Understanding The Foundation

Before combining styles, identify which traditional features deserve preservation because authentic details carry lasting character. Original beams, stone fireplaces, wood flooring, and arched openings often become the strongest visual anchors.

Modern additions should support those features instead of hiding them behind unnecessary decorative layers or oversized furniture. This approach keeps the space feeling intentional rather than accidentally mixed.

Architecture should lead every design decision

What Defines Old World Charm

Traditional European inspired interiors often emphasize craftsmanship instead of mass-produced decoration because handmade details create lasting visual depth. Rich wood tones, textured plaster, aged metals, and carved details naturally create warmth throughout every room.

Those materials develop attractive patina over time instead of losing appeal after years of everyday use. Consequently, they continue looking authentic as the home evolves.

What Makes Contemporary Design Work

Modern interiors prioritize simplicity because clear layouts reduce visual clutter and improve everyday comfort throughout active households. Neutral colors, streamlined furniture, hidden storage, and generous natural light create a fresh atmosphere.

These elements also allow older architectural features to receive more attention without overwhelming the room. As a result, every design decision feels more deliberate.

Start With Architectural Features

Architecture should lead every design decision because structural elements create permanent visual identity throughout the entire home. Preserve authentic features whenever possible before replacing them with newer alternatives.

Original moldings, brick walls, ceiling beams, and hardwood floors often become the strongest investment in timeless interiors. Even restored imperfections frequently add more personality than perfect replacements.

Preserve Existing Character

Repair old wood instead of replacing it whenever practical because restoration often keeps valuable craftsmanship intact for future generations. Refinishing floors, repairing doors, and refreshing decorative trim usually deliver impressive results.

Small repairs often preserve authenticity while reducing renovation costs compared with complete replacement projects. Therefore, careful restoration deserves priority whenever possible.

Add Modern Enhancements Carefully

Modern lighting, efficient insulation, and improved windows can increase comfort without removing historic personality from meaningful spaces. Choose upgrades that respect existing proportions and original materials whenever possible.

Hidden improvements often provide the greatest comfort while remaining visually invisible throughout finished rooms. Consequently, practical performance improves without sacrificing timeless appeal.

Balance Traditional And Modern Materials

Material selection determines whether blended interiors feel harmonious or disconnected because surfaces occupy most visible space throughout every room. Choose authentic materials that complement each other naturally.

Avoid making every surface appear either brand new or heavily distressed because contrast should feel intentional instead of forced. Balanced finishes create more believable visual relationships.

Wood Creates Lasting Warmth

Natural wood immediately softens contemporary interiors because organic grain introduces visual movement without overwhelming simple spaces. Oak, walnut, and reclaimed timber work especially well.

Mix darker antique inspired pieces with lighter modern finishes because thoughtful contrast creates greater visual richness. This combination also prevents rooms from feeling overly heavy.

Stone Adds Authentic Texture

Stone introduces permanence because its natural variation creates depth that manufactured finishes rarely achieve consistently. Fireplaces, kitchen backsplashes, and flooring benefit particularly from this material.

Limestone, travertine, and slate pair beautifully with sleek cabinetry because rough and smooth surfaces balance each other naturally. As a result, the room feels both refined and welcoming.

Metal Connects Both Styles

Metal finishes bridge traditional and modern design because they introduce subtle contrast through texture and reflective qualities. Aged brass, bronze, and matte black remain versatile choices.

Use consistent finishes across lighting, hardware, and fixtures because repetition creates stronger visual cohesion. However, avoid matching every metallic detail perfectly.

Choose A Cohesive Color Palette

Color quietly controls emotional atmosphere because it influences how every material appears throughout changing daylight conditions. Start with a calm foundation before adding richer accents.

Soft whites, warm creams, gentle taupe, and muted gray create flexible backgrounds for layered decorating. These shades also highlight natural textures more effectively.

Build Around Neutral Foundations

Neutral walls allow traditional details to shine because decorative trim and antique furniture become stronger visual focal points. They also help modern furniture appear lighter.

This balance keeps spaces feeling bright without sacrificing warmth or character throughout every season. Consequently, future decorating changes become much easier.

Add Rich Accent Colors

Deep olive, navy, terracotta, and burgundy introduce historical richness because those colors naturally complement wood and stone surfaces. Use them thoughtfully through smaller decorative elements.

Accent colors work especially well through pillows, artwork, rugs, and upholstery because those pieces remain easier to update later. Therefore, bold choices feel less risky.

Select Furniture With Purpose

Furniture should create conversation between generations because meaningful contrast makes blended interiors feel collected instead of purchased together. Focus on proportion before decoration.

Mix heirloom inspired pieces with contemporary silhouettes because balance matters more than strict matching throughout every room. Each piece should contribute a clear purpose.

Mix Silhouettes Thoughtfully

A carved dining table pairs beautifully with modern chairs because contrasting shapes create interesting visual dialogue without appearing chaotic. Likewise, streamlined sofas complement antique side tables.

Keep furniture scale balanced because oversized pieces can overpower delicate architectural details throughout smaller spaces. Consistent proportions preserve visual harmony.

Prioritize Comfort

Timeless rooms should support everyday living because beautiful spaces lose value when they feel uncomfortable during regular use. Choose quality seating with durable upholstery.

Comfort encourages longer gatherings while helping the home remain inviting throughout changing lifestyles and family needs. Consequently, practicality strengthens lasting appeal.

Layer Textures Instead Of Decorations

Texture creates emotional warmth because varied surfaces stimulate visual interest without relying on excessive decorative accessories. Layer materials gradually rather than all at once.

Natural fabrics, woven baskets, ceramic pieces, and linen curtains create comfortable depth throughout contemporary spaces with traditional influence. Each layer should feel purposeful.

Use Soft Textiles

Linen, wool, and cotton soften harder materials because fabric introduces warmth against stone, wood, and metal surfaces. Layer rugs for additional comfort.

Natural fibers also age gracefully while maintaining timeless appeal through changing decorating trends and seasonal updates. Therefore, they remain reliable long term investments.

Display Handmade Objects

Handcrafted pottery, woven accessories, and artisan artwork strengthen authenticity because imperfect details often create stronger emotional connection. Limit decorative collections carefully.

Leaving empty space around meaningful objects helps each piece receive more attention without creating unnecessary clutter. This restraint improves overall elegance.

Make Lighting Feel Warm And Inviting

Lighting shapes atmosphere because brightness alone never creates genuine comfort throughout living spaces. Layer different light sources instead of relying exclusively on ceiling fixtures.

Warm white bulbs generally create the most welcoming appearance because they complement traditional materials beautifully during evening hours. Consistent lighting improves visual balance.

Combine Multiple Light Sources

Table lamps, wall sconces, and pendant lights create flexible illumination because different activities require different lighting levels. This layered approach increases functionality.

Multiple sources also reduce harsh shadows while highlighting architectural details more effectively throughout every room. Consequently, spaces feel softer after sunset.

Highlight Historic Details

Aim lighting toward beams, fireplaces, or textured walls because focused illumination celebrates craftsmanship without demanding excessive decoration. Subtle emphasis creates memorable visual moments.

This strategy keeps traditional features visible while preserving a calm contemporary atmosphere throughout the surrounding space. Balance remains the central goal.

Create Functional Modern Spaces

Beautiful homes should support everyday routines because timeless design succeeds through practical performance rather than appearance alone. Organize rooms around real habits.

Hidden storage, efficient layouts, and durable finishes help preserve visual calm throughout busy households without reducing historic charm. Practical planning strengthens lasting comfort.

Keep Kitchens Practical

Contemporary cabinetry works beautifully beside rustic shelving because contrasting materials create balanced visual interest without sacrificing storage capacity. Integrated appliances maintain cleaner sightlines.

Stone countertops and traditional hardware strengthen continuity while preserving everyday convenience throughout active cooking spaces. Therefore, function and character remain equally important.

Refresh Bathrooms Thoughtfully

Modern fixtures pair well with vintage mirrors because reflective contrast creates elegant balance without overwhelming compact rooms. Natural stone enhances lasting appeal.

Choose timeless finishes over short lived trends because replacement becomes more expensive after installation. Careful planning protects long term satisfaction.

Common Mistakes To Avoid

Many blended interiors fail because designers chase trends instead of creating meaningful relationships between old and new elements. Avoid rushing important decisions.

Recognizing common mistakes early often prevents expensive redesigns while preserving stronger long term visual consistency throughout the entire home. Patience produces better results.

Instead of repeating decorative themes everywhere, allow each room to develop subtle personality while maintaining overall continuity. Variety strengthens authenticity without reducing cohesion.

Keep these pitfalls in mind:

  • Using too many distressed finishes together
  • Mixing unrelated historical styles without purpose
  • Ignoring furniture proportions
  • Over decorating every surface
  • Choosing cold lighting throughout the home

A Simple Room By Room Strategy

Working gradually reduces overwhelm because each completed room builds confidence before larger renovation decisions become necessary. Start where daily life matters most.

Living rooms often deliver the quickest transformation because furniture, lighting, and textiles create immediate visual impact. Early success encourages consistent progress.

Follow this practical sequence:

  • Preserve original architectural features first
  • Paint walls using warm neutral colors
  • Add contemporary seating beside classic pieces
  • Layer natural textiles and textured accessories
  • Finish with warm lighting and meaningful artwork

Conclusion

Blending Old World Charm With Contemporary Design succeeds when every choice respects history while supporting modern living with equal confidence. Preserve meaningful character, introduce thoughtful updates, and prioritize comfort because timeless interiors always feel authentic rather than trendy. Start with one room today, apply these principles carefully, and build a home that remains welcoming for years ahead.

FAQs

How do I blend Old World charm with contemporary design without making rooms feel outdated?

Combine preserved architectural features with streamlined furniture and warm neutral colors for balanced timeless appeal.

What colors work best for this blended design style?

Warm whites, cream, taupe, olive, navy, and terracotta create the strongest balanced foundation.

Can modern furniture work with antique pieces?

Yes, balanced proportions help contemporary furniture complement antique pieces naturally.

Which materials create the most authentic timeless look?

Natural wood, stone, linen, wool, brass, and bronze create lasting authentic character.

Should I restore original features before renovating?

Yes, preserving original architectural details usually creates stronger long term value and personality.

Beyond Aesthetics: What Actually Makes A Home Feel Timeless And Inviting

A stunning room loses value when daily living becomes inconvenient

A home feels timeless and inviting when it balances comfort, functionality, and emotional connection. Beautiful finishes matter, yet thoughtful layouts, natural light, quality materials, and personal meaning create lasting appeal.

Research consistently shows that people spend nearly 90% of their time indoors. Additionally, studies suggest that well designed living spaces can positively influence mood, productivity, and overall wellbeing. While trends change quickly, truly welcoming homes remain attractive across decades. Therefore, understanding what creates lasting comfort helps homeowners make better decisions that age gracefully and support everyday life.

The Difference Between Looking Beautiful And Feeling Right

Many homes photograph beautifully but feel surprisingly cold in person. Attractive styling often captures attention, yet comfort determines whether people enjoy spending time there.

Timeless homes prioritize experience over appearance. As a result, visitors remember how the space made them feel rather than what color the walls were.

Design trends often focus on visual novelty. However, enduring homes focus on human needs that rarely change.

People consistently seek warmth, comfort, connection, and ease. Therefore, homes that support these needs naturally remain relevant longer.

Storage Matters More Than Most People Think

Why Function Always Outlasts Fashion

A stunning room loses value when daily living becomes inconvenient. In contrast, functional spaces continue serving residents effectively for many years.

Good design removes friction from everyday routines. Consequently, people experience less stress and greater satisfaction within their homes.

Practical Layouts Create Lasting Appeal

Timeless homes support natural movement between rooms. Moreover, they allow activities to happen comfortably without creating unnecessary obstacles.

Well planned layouts adapt to changing lifestyles. As families grow or circumstances change, flexible spaces continue providing value.

Storage Matters More Than Most People Think

Clutter quickly undermines even the most beautiful interiors. Therefore, smart storage solutions contribute significantly to lasting comfort.

Hidden storage reduces visual noise throughout the home. Consequently, rooms feel calmer, cleaner, and more welcoming every day.

The Emotional Architecture Of A Welcoming Home

People connect emotionally with spaces before analyzing design details. Because of this, atmosphere often matters more than decoration.

Inviting homes create a sense of belonging immediately. Furthermore, they encourage relaxation without demanding attention.

Familiarity Builds Comfort

Humans naturally appreciate environments that feel understandable and predictable. Therefore, balanced proportions often feel more welcoming than dramatic experimentation.

Rooms with logical organization reduce mental effort. As a result, people feel comfortable settling into the space quickly.

Personal Meaning Creates Authentic Character

A timeless home reflects the people living there. Consequently, meaningful objects often contribute more value than expensive decorative accessories.

Family heirlooms, travel memories, and personal collections tell authentic stories. Therefore, these elements create uniqueness that trends cannot replicate.

Natural Light Remains The Ultimate Luxury

Few design features influence a home more profoundly than natural light. Regardless of style, bright spaces generally feel larger and more welcoming.

Sunlight changes throughout the day and seasons. Consequently, it adds movement, depth, and life to interior environments.

Layer Light Instead Of Relying On One Source

Successful homes combine multiple lighting sources thoughtfully. Therefore, spaces remain comfortable during different activities and times.

A balanced lighting strategy often includes:

: Ambient lighting for overall illumination
: Task lighting for focused activities
: Accent lighting for visual interest
: Natural light whenever possible

This layered approach creates flexibility and comfort. As a result, rooms feel inviting under varying conditions.

Quality Materials Age Better Than Trends

Timeless homes often feature materials that improve with use. Rather than chasing novelty, they embrace durability and authenticity.

Natural materials typically develop character over time. Consequently, they remain attractive even after years of daily use.

Texture Creates Depth And Warmth

Many modern interiors emphasize visual simplicity. However, texture adds richness without overwhelming a space.

Wood, stone, linen, wool, and leather provide tactile variety. Therefore, rooms feel more layered and welcoming.

Authenticity Outperforms Perfection

Perfect surfaces can sometimes feel sterile or impersonal. In contrast, authentic materials often display subtle variations that add charm.

Small imperfections communicate craftsmanship and character. As a result, spaces feel more human and approachable.

Comfort Is A Design Principle, Not An Afterthought

Many homeowners focus heavily on appearance during renovations. However, physical comfort deserves equal attention.

Inviting homes support the body as well as the eye. Therefore, furniture selection becomes particularly important.

Furniture Should Encourage Living

Beautiful furniture that nobody enjoys using creates frustration. Consequently, comfort should remain a primary consideration.

Supportive seating encourages conversation and relaxation. Moreover, comfortable arrangements naturally draw people together.

Temperature And Acoustics Matter

Comfort extends beyond furniture and finishes. In fact, temperature control and sound quality strongly affect how spaces feel.

Poor acoustics create subtle stress throughout the day. Therefore, rugs, fabrics, and soft surfaces often improve comfort significantly.

The Power Of Human Scale

Some homes feel impressive but intimidating. Meanwhile, timeless homes balance spaciousness with intimacy.

Human scale refers to proportions that feel comfortable and relatable. Consequently, rooms feel welcoming rather than overwhelming.

Create Spaces Within Spaces

Large rooms benefit from defined activity zones. Therefore, furniture arrangements should support different forms of interaction.

Reading corners, conversation areas, and dining spaces add purpose. As a result, larger rooms feel more usable and inviting.

Avoid Designing Only For Occasions

Many people design around rare events rather than daily life. However, everyday functionality delivers greater long term satisfaction.

Homes should primarily serve regular routines. Consequently, practical comfort should guide most design decisions.

Connection To Nature Never Goes Out Of Style

Humans naturally respond positively to natural elements. Therefore, incorporating nature remains one of the most reliable design strategies.
Even small connections to the outdoors create benefits. Moreover, these elements complement nearly every design style.

Bring Nature Indoors Thoughtfully

Simple additions often make meaningful differences:

: Indoor plants with varied shapes
: Natural wood surfaces
: Organic textures and fibers
: Views toward outdoor spaces
: Seasonal natural arrangements

These features introduce visual softness and balance. Consequently, interiors feel calmer and more welcoming.

Preserve Visual Breathing Room

Not every surface requires decoration. Instead, empty space helps highlight meaningful elements.

Thoughtful restraint prevents visual fatigue. Therefore, homes feel more peaceful and timeless over the years.

Consistency Creates Long Term Harmony

Timeless homes rarely rely on dramatic contrasts everywhere. Instead, they maintain a cohesive design language throughout.

Consistency does not mean uniformity. Rather, it means creating relationships between spaces that feel intentional.

Repeat Key Elements Strategically

Repeating materials, colors, or shapes creates visual continuity. Consequently, the home feels unified and balanced.

Small connections between rooms strengthen overall flow. Therefore, transitions feel natural rather than abrupt.

Let Rooms Evolve Naturally

A timeless home develops gradually over time. Because of this, homeowners can make thoughtful decisions without rushing.

Collected interiors often feel more authentic than instantly completed ones. As a result, they gain character and depth.

Designing For People Rather Than Trends

Trend driven decisions often age quickly. Conversely, people centered decisions remain valuable because human needs stay relatively consistent.

Before making changes, ask practical questions:

: Does this improve daily living?
: Will it remain useful in five years?
: Does it support comfort and connection?
: Does it reflect personal values?
: Can it adapt to future needs?

These questions encourage better long term choices. Therefore, the home remains relevant despite changing styles.

Conclusion

A timeless and inviting home is not defined by luxury, trendiness, or perfection. Instead, it emerges from thoughtful functionality, emotional warmth, natural light, quality materials, personal meaning, and everyday comfort. Focus on how people experience the space rather than how it appears in photographs. Start by improving one room with comfort, functionality, and authenticity in mind, then build a home that continues welcoming people for years to come.

FAQs

What is the most important feature of a timeless home?

A functional layout that supports daily life is often the most important feature.

Do timeless homes need expensive materials?

No, durable and authentic materials matter more than high cost finishes.

How can I make my home feel more inviting quickly?

Improve lighting, reduce clutter, and create comfortable seating areas.

Are design trends always bad for timeless homes?

No, trends can work when they support lasting comfort and functionality.

Why does natural light matter so much?

Natural light improves mood, enhances spaces, and creates visual warmth.

What is Pink Insulation Made of?

Pink insulation is a widely used material in the construction industry for its thermal and soundproofing properties

Pink insulation is a widely used material in the construction industry for its thermal and soundproofing properties. But what is pink insulation made of? This type of insulation is typically made from a combination of natural and synthetic materials, such as fiberglass, rock wool, and recycled materials. The manufacturing process typically involves melting the raw materials and spinning them into fibers, which are then bonded together to form the final product. The pink color of the insulation is often the result of an added dye, which helps to differentiate it from other types of insulation. Overall, pink insulation is a highly effective and eco-friendly way to improve the energy efficiency and comfort of homes and buildings.
Fiberglass

The primary component of most pink insulation is fiberglass. Fiberglass itself is made from beautiful fibers of glass. To make fiberglass, glass is first melted down and spun into thin strands. These glass strands are then woven into a texture similar to wool or cotton.

The result is a fluffy, cotton-candy-like material containing tiny air pockets between the glass fibers. These small air pockets give fiberglass excellent insulating properties, trapping heat to keep it from escaping.

The primary component of most pink insulation is fiberglass. Fiberglass itself is made from beautiful fibers of glass

Binder

While fiberglass gives pink insulation its structure, a binder holds the cotton candy texture together. Binders are adhesive-like substances with glass fibers together and provide insulation with their distinctive pink color.

The most common binder used in pink insulation is phenol-formaldehyde resin. This thermosetting plastic binder is made from a reaction of phenol and formaldehyde. A stiff yet flexible resin helps the insulation hold its shape and remain fluffy.

Other binders sometimes used include acrylics, polyester, and urea-based polymers. The binder comprises about 5-20% of the total weight of the insulation. Without this binding agent, the pink insulation would fall apart into thin wisps of fiberglass.

Fire Retardant Additives

One important additive to pink insulation is a fire retardant. Plain fiberglass and binder, on their own, are flammable. To reduce the fire risk, pink insulation contains fire-resistant compounds.

The most common fire retardant used is boric acid. Boric acid is a white, crystalline chemical made from boron that resists burning. Fire retardants like hydrated alumina, ammonium sulfate, and calcium borosilicate may also be added.

These fire retardant chemicals alter the insulation material to slow ignition, prevent flames from spreading quickly, and reduce smoke. This is a crucial safety addition for insulation used in home and office walls.

Antistatic Additives

Another common additive is antistatic compounds. This helps prevent static buildup on the insulation over time. Without antistatic additives, static charges could accumulate on the insulation surface, leading to popping and crackling sounds or small shocks.

Antistatic chemicals like long-chain aliphatic amines are infused into the binder. This helps absorb and dissipate any static charge, making the insulation non-conductive of electricity.

Antimicrobials

Since insulation is often exposed to warmth and humidity within building walls, microbial growth can occur over time. Pink insulation usually contains antimicrobial ingredients to prevent mold, mildew, and bacterial growth.

Antimicrobials such as zinc borate or oxides are added to discourage microbes from reproducing and spreading in the insulation. This helps the insulation remain clean and adequate for longer.

Read Also: 9 Ways Changing Furniture Can Improve Your Home

Manufacturing Process

The manufacturing process for pink insulation brings all these ingredients together. Here are the basic steps involved:

Glass Melting

First, raw materials like silica sand, soda ash, and limestone are melted together at extremely high temperatures exceeding 2500°F. This melted glass, called molten glass, is spun into thin fibers.

Fiber Spinning

The molten glass flows into specialized spinning machines. Like cotton candy machines, hundreds of tiny holes rapidly spin the glass into fine fibers.


This process can produce glass filaments thinner than human hair. The fibers are sprayed with binder onto a moving conveyor belt, where the fibrous mat begins to take shape.

Curing Ovens

The fiberglass mat then enters large curing ovens. These ovens harden and set the binder at high heat, firmly locking the glass fibers together. This forms a rigid, resilient sheet of fiberglass insulation.

Product Cutting

The cured fiberglass sheets are trimmed to specific sizes using cutting wheels, slitters, or compressed air knives. The sizes match standard insulation dimensions for walls, attics, and other applications.

Packaging

Finally, the fiberglass insulation is compressed and packaged into rolls or batts. The finished pink insulation rolls are wrapped in plastic sheeting or paper-facing before shipping to retailers or job sites.

Safety Equipment

The manufacturing process also utilizes extensive worker safety precautions. Plant employees wear protective clothing, gloves, goggles, and respirators due to the tiny glass dust particles produced. Proper ventilation, dust control, and air monitoring are critical.

This covers the main components and steps in producing traditional pink fiberglass insulation. The result is an affordable, easy-to-install insulation product that is valuable for energy efficiency in all buildings.

While traditional pink insulation relies on fiberglass, some other materials can also be used:

Alternatives to Fiberglass Insulation

While traditional pink insulation relies on fiberglass, some other materials can also be used:

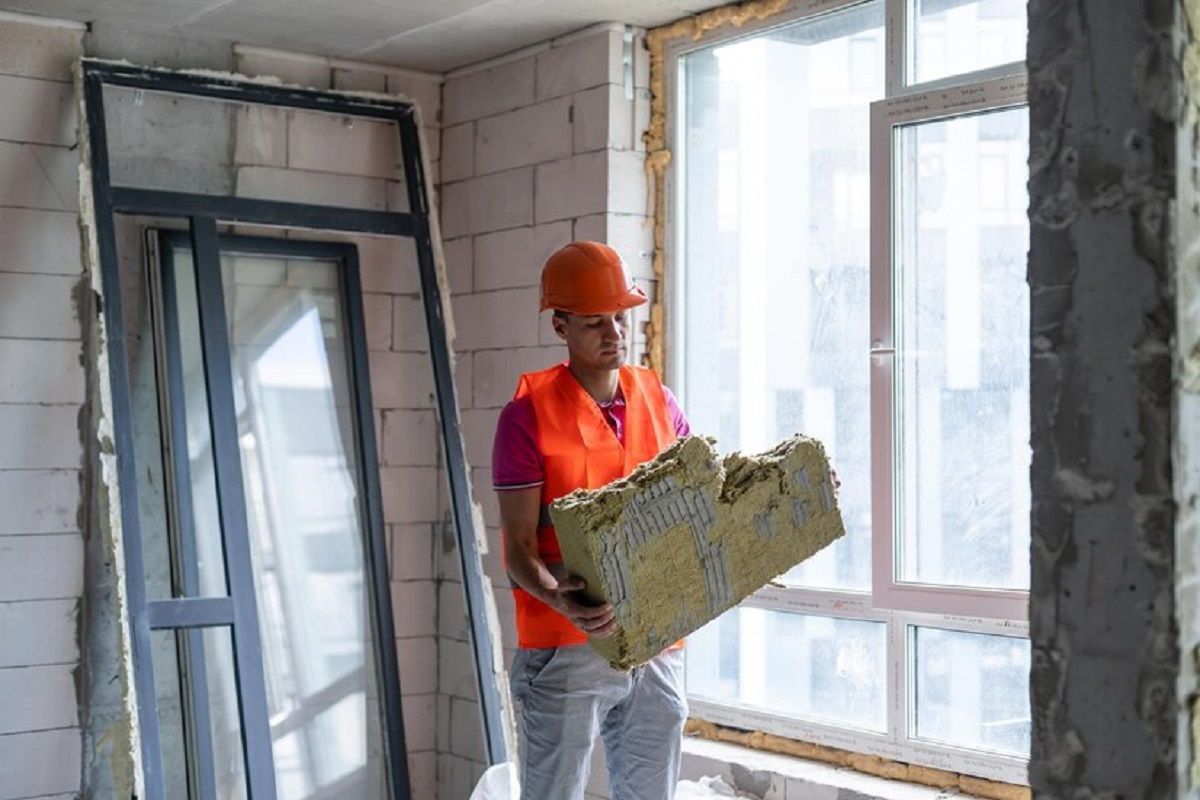
  • Mineral Wool – Insulation from molten slag, rock, or glass recycled from waste streams. Provides similar insulation capability as fiberglass.
  • Cotton – Insulation made from recycled denim or other cotton products. Contains no fiberglass for a more natural insulation option.
  • Cellulose – Insulation made from recycled newspaper, cardboard, or other paper and treated with fire retardant like boric acid.
  • Polystyrene – Rigid foam insulation board made from expanded polystyrene plastic beads. Available in pink or blue tints.
  • Polyurethane – Spray foam insulation that expands and hardens in place to seal cracks. Provides insulation and air sealing.
  • EPS Foam – Molded expanded polystyrene rigid foam boards. Lower density than extruded polystyrene.
  • Spray Foam – Foam insulation is sprayed in place and allowed to expand to form an air-sealing barrier and is made from polyurethane or epoxy resin.
  • Aerogel – Exotic synthetic material derived from silica gel with low density and thermal conductivity. More expensive than traditional insulations.

So, while pink has become nearly synonymous with fiberglass insulation, consumers today have more choices depending on their needs and budget.

Pros and Cons of Pink Fiberglass Insulation

Pink fiberglass insulation has both advantages and disadvantages compared to other insulation materials:

Pros:

  • Inexpensive cost
  • Readily available
  • Easy installation for DIYers
  • Works for both thermal insulation and soundproofing
  • It does not promote mold growth
  • Fire-resistant with proper chemical treatment
  • Loose-fill blown-in fiberglass can reach tight spaces
  • Batts and rolls suitable for standard wall cavities
  • A wide range of thicknesses and R-values are available

Cons:

  • Can cause skin irritation during handling and installation
  • Requires protective equipment like long sleeves, gloves, and goggles
  • It is not environmentally friendly, as fiberglass production uses substantial energy
  • Can sag and settle over time, reducing insulation value at the top of wall cavities
  • It is not effective as an air-sealing insulation like spray foam
  • It can cause respiratory issues if inhaled
  • It may make existing skin itch if touched after installation
  • Loose fiberglass debris can migrate through small gaps into living spaces

Pink fiberglass insulation offers an affordable and versatile option for thermally insulating homes and buildings. However, the safety, air gaps, and sustainability drawbacks may make some consumers consider other insulation materials for specific situations. Proper installation is critical to minimizing the downsides.

Common Applications for Pink Insulation

Thanks to its blend of low cost and effectiveness, here are some of the most common uses for pink fiberglass insulation:

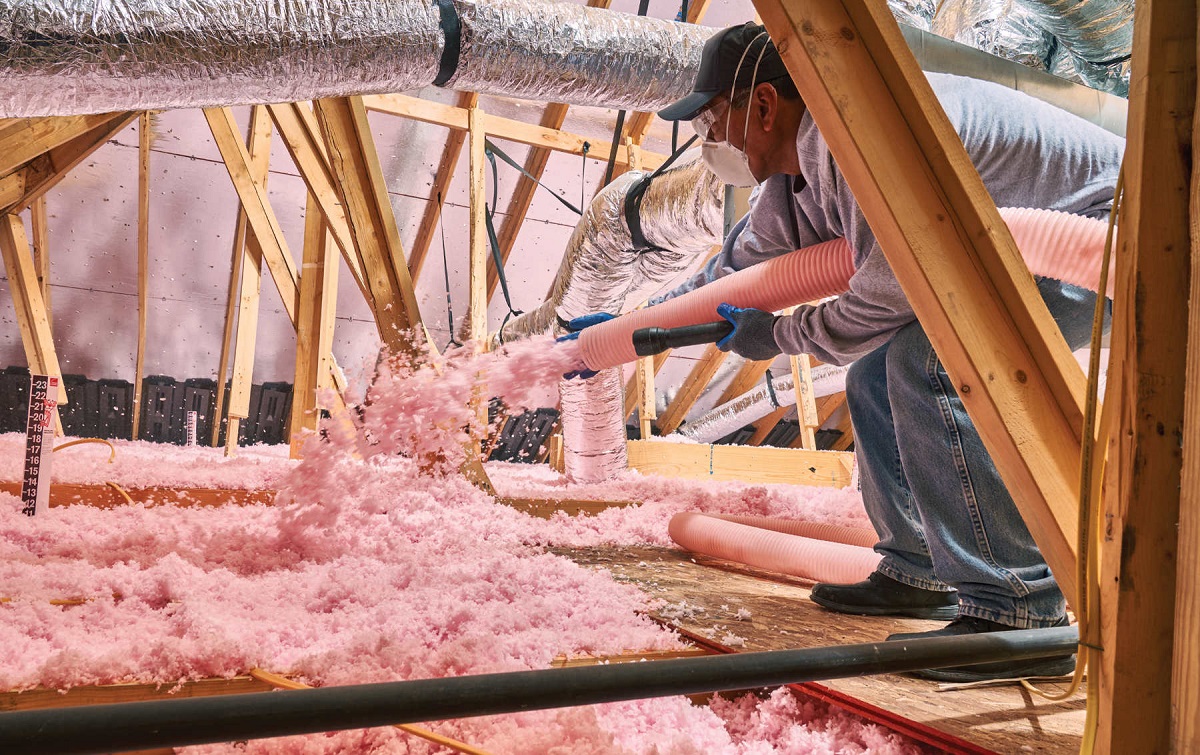
  • Attic insulation – Placed between and over attic floor joists to insulate ceilings below. It helps block heat loss through the roof.
  • Exterior wall insulation – Installed between wall studs to insulate outside house walls. It prevents air infiltration and reduces heating/cooling costs.
  • Basement wall insulation – Applied against concrete basement walls before finishing. It makes below-grade spaces more comfortable.
  • Duct insulation – Wrapped around HVAC ductwork to prevent energy waste from hot and cold ducts.
  • Pipe insulation – Used to insulate hot water pipes and cold water lines to reduce heat transfer.
  • Underfloor insulation – Placed beneath floor joists against subfloor to insulate floors above unheated spaces like garages or crawlspaces.
  • Acoustic insulation – Added in interior walls for soundproofing between rooms. Absorbs noise.
  • Masonry wall insulation – Special fiberglass inserts fit between concrete block cells or double brick walls.

For these applications, pink insulation provides an affordable way to improve energy efficiency and indoor comfort. It adapts well to standard construction methods and building materials. Proper installation in the correct amounts is critical to achieving optimal insulation performance.

How Much Pink Insulation is Needed?

Deciding how much pink insulation to install depends on several factors:

  • Climate – Colder regions need higher insulation levels to retain heat in winter. Hot climates also benefit from reducing summer cooling demands.
  • Insulation Location – Areas like attics, walls, crawlspaces, and basements have different recommended insulation levels based on their exposure to outdoor conditions.
  • Energy Codes – Most jurisdictions specify minimum insulation R-values for new construction and renovations based on climate data. This sets a baseline coverage.
  • Utility Costs – Homeowners may choose higher insulation amounts than their climate’s baseline to reduce their energy bills further.
  • Home Layout – Multi-story homes often need more insulation than single-story. Larger homes need more total insulation than smaller spaces.
  • Personal Comfort – Some homeowners want thicker insulation throughout the home for maximum comfort and noise dampening.

A balance between meeting local codes, budget, and personal energy goals will usually dictate suitable insulation levels. Consulting insulation guides or an energy auditor can provide specific home recommendations.

How to Install Pink Insulation

Proper installation of pink insulation is critical to ensuring it performs as expected:

  1. Read Labels – Check insulation labels for the correct type, R-value, and thickness needed for the location.
  2. Wear Protective Gear – Use long sleeves, pants, gloves, goggles, and mask to avoid skin and lung exposure.
  3. Air Seal First – Caulk, spray foam or weatherstrip all cracks and gaps before installing insulation.
  4. Cut to Fit – Cut batts to fit space for wall studs and floor joists using a utility knife. Keep insulation flush to joists without gaps or compression.
  5. Use a Backing – For wall insulation, staple reinforcement mesh or baffles to studs to help hold insulation in place.
  6. Install Vapor Barrier – For exterior walls, face paper or plastic side of batts inward toward heated space. This helps manage moisture.
  7. Stuff and Spackle – Press insulation fully into stud cavities for finished walls, then spackle over batting to hold in place.
  8. Inspect Coverage – Verify that insulation fits snugly without gaps or voids and meets the target R-value throughout the area.

Following manufacturer instructions for the specific pink insulation you purchase is always recommended. Hiring a professional for attic or more complex installations is a good idea for homes with limited DIY experience.

Maintaining and Replacing Pink Insulation

Pink insulation is relatively durable but may need replacement or maintenance over time:

  • Inspect attics, walls, and crawlspaces periodically for areas where insulation has sagged or pulled away from joists. This reduces its effectiveness. Spot-fix these gaps or add additional insulation if needed.
  • Rodents, birds, and insects can sometimes nest in exposed insulation, disturbing its placement. Remove any pests, nesting material, and contaminated insulation. Replace with new insulation to fill cavities.
  • Moisture intrusion, roof leaks, flooding, or excess humidity can damage insulation, especially if wet. Replace water-logged insulation once the leak is fixed and the area fully dries out.
  • Use insulation depth gauges in attics and walls to check if the insulation has settled over the years. Top up low spots with new insulation to maintain even coverage at the target R-value.
  • Renovations, upgrades like attic conversions, and rewiring/replumbing may disturb existing insulation. After completing work, ensure insulation coverage meets codes for the new space layout and use.

With occasional inspections and repairs, quality pink fiberglass insulation should last decades before requiring total replacement. Maintaining proper insulation coverage saves energy over the entire life of the home.

Is Pink Insulation Toxic or Safe?

The safety of pink insulation depends on proper precautions during handling:

  • Inhalation – If inhaled, freshly installed loose-fill fiberglass can release particulates that aggravate the lungs. Use respirators during installation until insulation is fully enclosed in walls or attics.
  • Skin Contact – The tiny glass fibers may irritate the skin and eyes during handling. Wear long sleeves, pants, gloves, and goggles when installing. Take a shower and change clothes afterward.
  • Existing Insulation – Fiberglass previously installed and sealed in walls or attics is generally not a respiratory concern. But do wear gloves, mask, and goggles if opening a wall.
  • VOCs – Some binders off-gas volatile organic compounds (VOCs) temporarily after installation. Keep spaces well-ventilated until VOCs disperse.
  • Fire Protection – Look for insulation labeled as fire-resistant with fire-retardant additives. This reduces fire spread risk if ignition occurs.

So, while not acutely toxic once contained in walls, proper safeguards during installation are crucial. Overall, the benefits of insulation for energy savings and comfort outweigh the moderate risks. Still, those with respiratory issues should consult their physician before working with fiberglass insulation directly.

Is Pink Insulation Environmentally Friendly?

Fiberglass insulation has some positives and negatives regarding environmental impact:

Positives

  • Provides substantial energy savings over the life of a building. This reduces carbon emissions from power generation.
  • It is made partially from recycled glass content.
  • Do not use blowing agents that deplete stratospheric ozone.
  • Contains recycled scrap fiberglass material in some products.

Negatives

  • Production of virgin fiberglass and binders uses significant energy and natural gas.
  • Binder chemicals can emit VOCs during and after manufacture.
  • Boric acid added as fire retardant can potentially leach out over time.
  • Fiberglass is challenging to recycle after removal and use.

It has more complex environmental trade-offs than some insulation types like cellulose or cotton. Fiberglass insulation is not renewable or biodegradable but enhances energy conservation in buildings. Consumers can compare ecological impacts when selecting insulation products that best fit their project.

Is Insulation Pink for Any Special Reason?

The pink color of traditional fiberglass insulation serves both aesthetic and functional purposes:

Visibility – The bright pink color makes the insulation more noticeable during installation. This helps confirm complete and proper coverage within wall cavities or attic spaces.

Warning – The color also warns installers that fiberglass is present, reminding them to use protective equipment to cover exposed skin and eyes.

Source Marking – Specific hues help identify the insulation manufacturer and production facility.

Binder Dye – Color pigments are added to binder liquids to produce distinctive pink shades before curing. Different colors are achievable using alternate pigments.

Marketing – Decades of use have made pink synonymous with fiberglass insulation. The color is now connected to insulation branding and advertising.

So, while not mandatory, the vibrant pink color benefits the insulation industry and supply chain. However, some manufacturers also offer fiberglass insulation in grey, green, yellow, or other hues based on customer preferences.

5 Key Takeaways About Pink Insulation

In summary, here are five key facts to remember about standard pink fiberglass insulation:

  1. Primarily contains microscopic fiberglass fibers bonded by plastic resins.
  2. Provides thermal and acoustic insulation for walls, attics, ducts, and other uses.
  3. It must be installed properly throughout spaces to form a continuous insulating barrier.
  4. Requires safe handling and protective equipment to minimize skin and respiratory irritation.
  5. Delivers proven energy savings, comfort, and noise reduction when installed correctly in sufficient amounts.

FAQs

Q: Is pink insulation itchy?

A: Handling fresh, loose-fill pink fiberglass insulation can cause temporary skin itching due to the delicate glass fibers. Wearing long sleeves, pants, gloves, and goggles prevents skin contact and irritation during installation. Once enclosed within walls or attics, existing insulation generally does not cause itching.

Q: Does pink insulation go bad?

A: Properly installed pink fiberglass insulation is highly durable and does not readily biodegrade or expire. However, over decades, moisture damage, pests, repeated compression, or disturbance can reduce insulation effectiveness. Monitoring conditions and topping up low spots preserves thermal performance.

Q: Is pink insulation toxic?

A: Fresh fiberglass insulation can temporarily irritate the lungs if inhaled during handling. Sealed insulation is not a respiratory hazard. Binder materials and fire retardants meet health safety standards when cured and enclosed. With precautions during installation, it poses minimal toxicity risk in a finished home.

Q: Is pink insulation flammable?

A: Plain fiberglass is combustible when exposed to flame. But commercial pink insulation contains fire-resistant additives that deter ignition and slow fire spread. This makes adequately treated pink insulation acceptably fire-rated for in-wall and attic use per codes.

Q: Does pink insulation cause cancer?

A: After extensive research over decades, fiberglass insulation has not been demonstrated to cause cancer or other diseases. While the glass fibers can irritate skin and lungs if directly handled, the cured resins pose minimal health risks for installers and building occupants. Proper precautions make risks negligible for this common insulation material.

In Summary

Traditional pink fiberglass insulation provides time-tested thermal and acoustic insulation for homes and buildings. While handling requires safety measures, it blocks heat transfer at an affordable price when properly installed. Fiberglass’s iconic pink coloration delivers comfort, energy savings, fire resistance, and noise control. Understanding what standard pink insulation contains and how it is made allows homeowners to use it effectively. With appropriate precautions and coverage amounts, pink insulation remains a top choice for cost-effective insulation projects.

How to Make a Baby Go to Sleep Fast: Tried and Tested Methods

How to Make a Baby Go to Sleep Fast

To make a baby go to sleep fast, establish a bedtime routine, and create a calm sleep environment. Consistency is key.

Are you struggling to get your little one to sleep quickly? Many parents face the challenge of soothing their baby into a peaceful slumber. By following the right steps and implementing effective strategies, you can help your baby drift off to sleep faster.

We’ll explore practical tips and techniques recommended by Pro Baby Guide that can make bedtime a smoother and more enjoyable experience for both you and your baby. From setting a consistent bedtime routine to creating a serene sleep environment, these methods are designed to promote relaxation and encourage deep, restful sleep for your little one. Incorporating a rocking baby chair into your nightly routine can add an extra layer of calm, gently soothing your child into sleepiness. Read on to discover how Pro Baby Guide suggests you can make a baby go to sleep fast and ensure a peaceful night’s rest for your child, with the help of a comforting rocking baby chair.

Creating The Right Environment

Creating The Right Environment

To help your baby go to sleep fast, it is crucial to create an environment that promotes relaxation and comfort.

Setting The Mood

Choose soothing colors like soft blues or pastels for the nursery to create a calming atmosphere.

Controlling Noise And Light

  • Avoid loud noises that can startle the baby from sleep.
  • Use blackout curtains to block out excess light and create a dark sleeping environment.

Establishing A Bedtime Routine

Consistency Is Key

Stick to the same bedtime every night to help regulate your baby’s sleep pattern.

Consistency reinforces the body’s internal clock, making it easier for your baby to fall asleep.

Relaxing Activities Before Bed

Engage in soothing activities like reading a book or gentle rocking to calm your baby.

  • Reading a bedtime story can relax the mind and signal that it’s time for sleep.
  • Gently swaying or dimming the lights can create a peaceful environment for bedtime.

Understanding Sleep Cues

Understand baby sleep cues to help them doze off quickly. Pay attention to their tired signs, such as rubbing their eyes or becoming fussy. By recognizing these cues, you can create a soothing bedtime routine that guides the baby to sleep faster.

Understanding Sleep Cues Babies have their own unique ways of communicating when they are tired and ready for sleep. By learning to recognize these sleep cues, parents can help their little ones drift off to dreamland more easily and quickly. In this section, we will explore the signs of tiredness and overstimulation, enabling you to respond to your baby’s needs effectively. Recognizing Tiredness 

  • Fussiness: Babies may become irritable when they are tired, fussing, and crying more than usual. 
  • Yawning or Rubbing Eyes: These are classic signs of tiredness in babies, indicating that they are ready for some rest. 
  • Decreased Activity: When a baby becomes less active and starts to slow down, it’s a clear indication that they are getting sleepy. 

Signs of Overstimulation Babies can easily become overstimulated, making it difficult for them to settle and fall asleep. It’s important to be mindful of the following signs of overstimulation: 

  • Fussiness and Crying: Overstimulation can manifest as increased fussiness and crying. 
  • Avoiding Eye Contact: When a baby avoids eye contact and becomes agitated, it may be a sign that they are overstimulated. 
  • Difficulty Calming Down: If your baby is finding it hard to calm down despite your usual soothing techniques, they may be overstimulated. 

Understanding and responding to your baby’s sleep cues is essential for fostering healthy sleep habits. By being attentive to their signals and providing a soothing environment, you can facilitate a quicker transition to sleep for your little one.

Using Soothing Techniques

When it comes to getting your little one to drift off into dreamland quickly, using soothing techniques can work wonders. By creating a calm and peaceful environment, you can help your baby relax and fall asleep faster. Two effective techniques include gentle touch and massage, as well as comforting sounds or music.

Gentle Touch And Massage

Babies respond well to gentle touch and massage because it mimics the comfort and security they feel in the womb. The act of gentle touch releases calming hormones such as oxytocin, which helps soothe your baby’s nerves and promotes relaxation. Here are a few key benefits of incorporating gentle touch and massage into your bedtime routine:

  • Improved blood circulation, leading to better sleep
  • Relief from any discomfort or gas
  • Enhanced bonding between you and your baby

When massaging your baby, remember these important tips:

  1. Find a quiet and warm space to ensure your baby feels comfortable
  2. Use a baby-safe oil or lotion to prevent friction
  3. Start with gentle strokes on your baby’s arms, legs, and back
  4. Observe your baby’s response and adjust your pressure accordingly

You can also incorporate gentle touch into your routine by softly stroking your baby’s forehead, cheeks, or belly. The key is to be gentle and follow your baby’s cues to avoid overstimulation.

Comforting Sounds Or Music

Another effective soothing technique to help your baby fall asleep faster is by playing comforting sounds or music. Gentle and rhythmic sounds can create a relaxing atmosphere that calms your baby’s mind and helps them unwind. Here are some popular options:

Type of Sound/Music Benefits
White noise Blocks out background noises and promotes better sleep
Lullabies Soft melodies that can soothe and lull your baby to sleep
Nature sounds Relaxing sounds such as rain, waves, or birdsong

When using sounds or music, keep the following tips in mind:

  • Choose gentle and calming sounds, avoiding anything too loud or abrupt
  • Experiment with different sounds to find what resonates with your baby
  • Ensure the volume is low and not too close to your baby’s ears

Remember, every baby is unique, so what works for one may not work for another. Be patient and open to adjusting your techniques until you find what helps your baby go to sleep fast. Using a combination of gentle touch, massage, and comforting sounds can create a serene sleep environment that promotes relaxation and prepares your baby for a good night’s rest.

Responding To Night Wakings

Responding To Night Wakings

When it comes to helping your baby sleep through the night, responding to night wakings is a crucial aspect. Comforting your baby without stimulating them and gradually helping them return to sleep are key techniques that can make a significant difference in your baby’s ability to fall back asleep quickly. In this section, we will explore these two strategies in detail.

Comforting Without Stimulation

  1. Keep the environment calm: Creating a soothing ambiance is essential to prevent overstimulation. Ensure the room is dimly lit and noise levels are minimized, promoting a relaxing atmosphere for your baby.
  2. Avoid eye contact: During night wakings, maintain a comforting presence while avoiding direct eye contact. This will prevent your baby from becoming wide awake and alert, enabling them to settle back to sleep quickly.
  3. Gentle touch: Offer gentle caresses or strokes to reassure your baby. Softly patting their back or lightly holding their hand can provide a sense of security and comfort.
  4. Use a pacifier if appropriate: For babies who find pacifiers soothing, consider offering one (following the pediatrician’s guidance). The sucking motion can help them relax, possibly leading them back to sleep faster.

Gradual Return To Sleep

  1. Stay by their side: During night wakings, sit or lie down near your baby’s crib. This physical presence can provide reassurance and aid in their journey back to sleep.
  2. Offer verbal reassurance: Speak in a calm and soothing tone, reassuring your baby that it is nighttime and time for sleep. Gentle and quiet phrases like “Shhh, it’s time to sleep,” can help guide them back to slumber.
  3. Implement a soothing routine: Incorporate a simple and consistent bedtime routine that includes calming activities like a warm bath, soft music, or a bedtime story. These familiar cues will signal to your baby that it is time to wind down and prepare for sleep.
  4. Gradually increase distance: Over time, aim to gradually increase the distance between you and your baby during night wakings. This can be achieved by first sitting next to the crib, and then gradually moving further away. The goal is to promote your baby’s growing independence while still providing comfort.
  5. Allow self-soothing: Giving your baby opportunities to learn to self-soothe is important for long-term sleep habits. Encourage them to settle themselves back to sleep by giving them a few moments of quiet before intervening.

Remember, every baby is unique, and it may take time to find the strategies that work best for your little one. Be patient and consistent with your approach, and soon you’ll be well on your way to helping your baby go to sleep fast and sleep through the night.

Frequently Asked Questions On How To Make A Baby Go To Sleep Fast

How Can I Help My Baby Fall Asleep Faster?

To help your baby fall asleep faster, establish a consistent bedtime routine, create a calm sleep environment, swaddle your baby, use white noise or soft music, and ensure your baby is comfortable and fed before sleep.

Is It Safe To Let My Baby Cry Themselves To Sleep?

It is not recommended to let a baby cry themselves to sleep. This can cause stress and anxiety for the baby. Instead, try gentle sleep training methods, such as the Ferber method or the gradual retreat method, which involve progressively reducing your involvement in helping your baby fall asleep.

What Are Some Natural Remedies To Help My Baby Sleep?

Natural remedies to help your baby sleep include using aromatherapy with lavender oil, giving your baby a warm bath before bedtime, massaging your baby’s body, ensuring a comfortable room temperature, and using a comfortable and supportive mattress. Consult with your healthcare provider before using any remedies.

Conclusion

Helping your baby to sleep quickly is a common challenge for parents. By following the tips discussed in this post, such as establishing a bedtime routine, creating a soothing environment, and understanding your baby’s cues, Explore Can Dry Air Cause Sleep Apnea?
you can improve your baby’s sleep.

Taking a proactive and patient approach will lead to better sleep for everyone.

How to Repair a Garage Door Panel With Aluminum Siding?

How to Repair a Garage Door Panel With Aluminum Siding

Having an aluminum garage door can be an excellent choice for many homeowners. Aluminum is lightweight, durable, and requires little maintenance compared to other materials like wood or steel. However, aluminum garage doors can still become dented or damaged over time and may need repairs. Replacing an entire aluminum garage door can be expensive, but repairing a single damaged panel is often an easy DIY project. Here is a comprehensive guide on how to repair a garage door panel clad in aluminum.

Assessing the Damage

Assessing the Damage

The first step is to thoroughly examine the damaged panel and identify the extent of the problem. Look along the edges and corners for cracks, splits, holes, or punctures in the aluminum skin. Press firmly on the center of the panel to feel for dents, buckling, or soft spots. Check the inside of the panel as well for any damage to the insulation or backing.

Minor dings, scratches, and holes in the aluminum exterior can often be repaired, but any cracks or splits in the metal will likely require complete panel replacement. Damage to the interior insulation also reduces the panel’s structural strength. If the damage is extensive, replacing the panel is the best option.

Removing the Damaged Panel

Once you’ve determined that the panel can be repaired, the next step is to remove it from the garage door. Start by fully opening and locking the door using vice clamps or C-clamps on the door tracks. This will prevent the door from trying to close while you work.

Locate the hinges, rollers, and any vertical support struts along the sides of the panel. The hardware and struts are held in place by screws or bolts that must be removed. Use a socket wrench, pliers, or screwdriver to detach and set aside the panel hardware. Pay attention to the location and arrangement of the parts, as you’ll need to reinstall them later.

With the perimeter hardware detached, the panel can now be unclipped from the adjoining panels. Garage door panels interlock using tongue-and-groove connections. Carefully lift and tilt the panel to pop it out from the weatherstripping on the top and sides. Take care not to bend or damage the edges of the neighboring panels.

Once unclipped, carefully lower the released panel down and set it on a workbench or sawhorse for repair. Temporary shims can fill the open space and prevent drafts until the new panel is installed.

Repairing Minor Aluminum Damage

For minor dings and scratches that do not penetrate the metal, rubbing and polishing compounds can help smooth and minimize the flaws in the aluminum exterior. Start with a less aggressive rubbing compound and use a microfiber cloth to buff out blemishes. Follow up with a polishing wax to restore luster.

Small holes or perforations can often be repaired using an aluminum patch kit. These kits contain thin aluminum sheeting, which can be cut to size and adhered to the damage using specialized glue. Use sandpaper to rough the metal around the hole so the glue bonds tightly. Carefully trim the patch to fit the hole before applying glue and firmly pressing it in place.

Filling Larger Holes and Gaps

A simple aluminum patch may not be enough for larger holes or gaps more comprehensive than a quarter inch. A backer material can be placed inside the panel before applying and adhering to the exterior aluminum patch. Fiberglass mesh works well as an internal reinforcing layer and helps bridge any gaps in support.

Cut a piece of fiberglass mesh slightly larger than the hole. Bend the mesh to create a curvature and gently press it into place on the inside of the panel over the hole. Then, trim a patch of aluminum sheeting to overlap the hole by at least 2 inches on all sides. Sand and rough up the area surrounding the hole before applying adhesive and pressing the aluminum patch firmly over the mesh backing.

Replacing Severely Damaged Panels

Replacing Severely Damaged Panels
Garage Door Panel Repair – CLT Garage Door Repair.

Replacing the entire panel is usually required for more extensive damage like large cracks, deep dents or punctures, rotted backing, or holes wider than a few inches. Garage door companies or home improvement stores can order new replacement panels. Please provide them with the damaged panel’s door manufacturer, model, and measurements.

Once you have the new replacement panel, installing it is straightforward. First, ensure the new panel matches the old one – same size, color, design, hardware holes, etc. Sand any rough edges. Then reverse the steps for removing the original panel:

  • Attach the perimeter hinges, rollers, and struts in their original locations with new hardware if needed.
  • Interlock the tongue-and-groove connections along the sides and top. Engage the weatherstripping.
  • Reopen the garage door slowly, keeping an eye on the alignment of the new panel. It should open, close, and lock evenly with the other panels.
  • Remove the shims and clamps holding the door open. Test operation several times to ensure proper function. Adjust hardware as needed to align the panel.
  • Seal any gaps with weatherstripping or caulk. Paint or touch up the edges to match.

With a bit of time and effort, repairing or replacing a garage door panel is usually a project well within the DIY abilities of most homeowners. Paying close attention to the existing hardware arrangements and properly interlocking the panel connections are critical to a successful repair. Maintaining aluminum garage doors through prompt maintenance will keep them looking great and functioning correctly for many years.

FAQs

Q: How can I tell if my dented aluminum panel needs to be replaced versus repaired?

A: Minor dings and scratches can usually be repaired, but deep dents, cracks, holes wider than 1/4 inch, or any damage to the backing likely requires complete panel replacement. Always thoroughly inspect both sides of the panel.

Q: What is the easiest temporary fix if my panel is badly damaged and needs to be replaced?

A: You can tape up plastic sheeting or attach a solid material like plywood with bolts over the damage until the replacement arrives. Just reinforce it well so the wind doesn’t rip it away.

Q: Is it OK to order just one replacement panel?

A: Yes, most garage door companies can match your existing door and provide a single replacement panel in the same color, material, design, etc., to fit seamlessly once installed.

Q: Can I reinforce a damaged aluminum panel myself if I can’t find an exact replacement?

A: It’s possible but challenging. You’ll need to bend and cut aluminum sheets carefully to patch over holes and dents and match up hinge holes precisely. Fiberglass backing for larger holes helps strengthen the repair.

Q: What’s the easiest way to remove an old rusted panel?

A: Penetrating oil applied liberally for a day or two before removal can help free up rusted bolts and hardware. An angle grinder with a metal cutoff wheel also works quickly to slice through rusted bolts if necessary.

Conclusion

Repairing an aluminum garage door panel is a typical DIY project that most homeowners can tackle successfully. Understanding how garage door sensors work is crucial for an effective repair process. The keys to an effective repair are to assess the damage accurately, remove panels safely, make durable repairs, and properly realign and seal a new panel, ensuring seamless functionality of the sensor system. With suitable materials and a little mechanical skill, you can often extend the life of your aluminum garage door and save the cost of complete door replacement. Keeping aluminum garage doors well maintained with minor panel repairs as soon as damage occurs will keep them functioning smoothly for many years.

Understand Composition Shingle Roof Lifespan: The Roofing Workhorse

Composition Shingle Roof Lifespan

Composition shingles, often called asphalt shingles, rule the residential roofing world. They’re famous for a reason – they’re budget-friendly, come in a wide variety of colors and styles, and, with proper care, provide solid protection for your home. But as with anything, they have a lifespan. So, how long do composition shingle roofs last? Let’s dig into composition shingle roof lifespan.

The Typical Lifespan: What to Expect

The Typical Lifespan What to Expect

Generally, most composition shingle roofs have 20 to 30 years of lifespan. That’s a significant amount of time for protecting your home. However, this range is just a ballpark figure, and many factors can make your roof last longer or shorter than expected. Let’s dive into these details.

Factors That Affect Your Roof’s Lifespan

Your roof is much like a prized member of your family who is frequently out in the elements – it takes a beating! Consider these factors to get a better sense of the composition of shingle roof lifespan:

  • Shingle Type: There are a few main types of composition shingles out there:
    • 3-Tab Shingles: These are the most basic and affordable, with around 20-25 years of lifespan.
    • Architectural Shingles: Sometimes called dimensional shingles, they offer thicker construction and enhanced durability. They generally last 25-30 years.
    • Luxury/Designer Shingles: These premium shingles boast superior durability, some even mimicking the look of tile or slate. They can last upwards of 30 years, perhaps even reaching the 50-year mark.
  • Climate and Weather: Your local climate heavily influences your roof’s lifespan. Extreme heat, constant hail, driving rain, snow, and high winds can cause accelerated wear and tear. Roofs in milder climates often fare better.
  • Installation Quality: A superb installation can set your roof up for a successful life. Shoddy artistry and incorrect techniques, however, can cut its life short. Always work with trusted, experienced roofing professionals.
  • Roof Maintenance: Like your car needs regular oil changes, your roof needs attention, too! Annual inspections, cleaning debris, fixing minor issues promptly, and proper attic ventilation ensure a long, healthy roof life.
  • Material Quality: Not all shingles are equal. Investing in higher-quality shingles can yield years of additional protection.

Signs Your Roof Might Need Replacement

Don’t wait until your ceiling drips to consider a roof replacement. Keep an eye out for these subtle (and not-so-subtle) clues:

  • Age: If your roof is reaching (or has surpassed) the end of its expected lifespan, it’s time for a severe checkup. Even without leaks, an older roof can be vulnerable to sudden failures.
  • Curling or Buckling Shingles: Warped shingles mean damaged granules and reduced waterproofing, allowing moisture intrusion and further damage.
  • Missing Shingles: Strong winds or old age can leave you missing ‘teeth’ in your roof’s defense. A few missing shingles are fixable. Widespread loss often calls for replacement.
  • Lots of Granules in Your Gutters: Shingles shed granules naturally as they age, but an overload in your gutters is a major red flag. These granules protect your shingles from UV rays, and their loss speeds up roof degradation.
  • Sunlight in Your Attic: Poke your head up there during the day. Any sunlight poking through is a sign of deteriorated shingles or damaged underlayment.
  • Roof Valleys: Valleys where two roof sections meet often deteriorate first. Keep a watchful eye out for shingle damage or wear in these critical areas.

Taking Care of Your Composition Shingle Roof

While you can’t reverse time or control the weather, you can influence your roof’s lifespan through thoughtful care:

  • Regular Inspections: Ideally, have a professional inspection twice yearly (especially after significant storms). You can also do some general checks yourself from the ground level. Early problem detection prevents more significant issues down the road.
  • Clean Gutters: Clogged gutters lead to water backup, which can seep under your shingles, causing damage. Clean your gutters regularly, especially during seasons with heavy leaf fall.
  • Trim Overhanging Branches: Tree branches rubbing against your roof cause significant wear to the shingles, and falling limbs can result in direct damage. Trim back any branches that could pose a threat.
  • Keep It Moss-Free: Moss buildup traps moisture against your roof. You can use unique treatments or consult a professional if moss becomes problematic.
  • Don’t Pressure Wash: High-pressure cleaning blasts away those crucial granules, shortening your roof’s life. If necessary, gentle cleaning solutions and light brushing are safer for your shingles.
  • Proper Attic Ventilation: A well-ventilated attic regulates temperature and moisture, preventing damage caused by trapped heat and condensation. Consult a professional to assess your attic ventilation needs.

When to Repair vs. Replace

Sometimes, isolated problems (like damage from a fallen branch) are fixable with targeted repairs. However, more extensive issues usually point to replacement:

  • Widespread Leaks: Multiple leaks and interior water damage suggest your roof structure might be compromised. It’s usually more cost-effective to replace the whole roof in these cases.
  • Roof Sagging: A sagging roof indicates damage to the underlying roof deck or supports, a major structural problem requiring major renovation, including a new roof.
  • Significant Granule Loss: If most of your roof has exposed asphalt due to severe granule loss, you’ve lost that critical UV protection, making widespread deterioration inevitable.

The Cost of a New Composition Shingle Roof

The Cost of a New Composition Shingle Roof

The roof replacement price varies depending on factors like your roof size, the type of shingles selected, and local labor costs. Generally, however, be prepared to pay anywhere from several thousand dollars to twenty thousand or more for a new asphalt shingle roof. While an investment, consider it vital protection for your most valuable asset – your home.

Making Smart Roofing Decisions

When the time comes to replace your roof, do your homework:

  • Get Multiple Quotes: Don’t jump at the first estimate. Compare prices from at least three reputable roofing contractors.
  • Check Licensing and Insurance: Ensure any contractor you consider is fully licensed and insured to protect yourself.
  • Understand Warranties: Compare shingle warranties carefully. They cover things like manufacturing defects and sometimes aspects of labor costs if a shingle fails early.
  • Think Long-Term: While tempting to grab the cheapest option, remember investing in high-quality materials and excellent artistry can pay off with more years of worry-free protection.

FAQs

Can a new roof be installed over my existing one?

Depending on local building codes and the health of your existing roof, you might be able to do a “layover” where new shingles are added over the old ones. However, a second layer adds weight and obscures pre-existing problems. Compete complete tear-off and a new roof are better long-term investments for many homeowners.

Should I DIY my roof replacement?

Unless you have profound roofing experience, this is generally a bad idea. Roofing mistakes can be costly and jeopardize the safety of your home. For the best results, trust the professionals.

Should I match my existing shingle color when replacing it?

Not necessarily! Your roof replacement is an excellent opportunity to update your home’s look. Explore colors that suit your home’s style and reflect your taste.

How do I find a good roofing contractor?

Start by getting recommendations from friends, family, neighbors, or realtors. Online searches (coupled with verifying licensure and good reviews) yield even more leads. Don’t forget reputable manufacturer websites also often include lists of local certified installers.

Is a high wind-rated shingle truly necessary?

Consider one, especially in areas prone to severe weather. Wind-rated shingles have enhanced bonding, making them less likely to get ripped off under heavy winds.

Conclusion

Your composition shingle roof is a valuable investment, and knowing how to care for it wisely pays off in the long run. Unveiling the Benefits of Roofing Coatings, while their lifespans can vary, regular maintenance, prompt repairs, and understanding when a replacement is due will ensure your home stays protected. comfortable, and resilient against the elements for decades.

How to Remove Toilet Seat Easily? Quick and Simple Tips

How to Remove Toilet Seat Easily

To remove a toilet seat, locate the secure bolts and use a screwdriver to unscrew them. Lift the seat and clean the area.

Removing a toilet seat is simple and can be done with a few essential tools. Whether you need to replace a damaged seat or clean the toilet thoroughly, knowing how to remove the seat is helpful.

This guide will walk you through the step-by-step process of removing a toilet seat, providing you with the knowledge and confidence to complete this task successfully. By following these instructions, you can remove the toilet seat efficiently and effectively. Whether you’re looking to clean, repair, or replace your toilet seat, understanding how to remove it properly is essential. With a clear and concise approach, this guide ensures that you’ll be equipped to handle the removal process smoothly, minimizing the risk of damage to your toilet or the seat itself. For more detailed guides and helpful tips on home improvement tasks like this, be sure to visit https://beebuze.com/, where you’ll find a wealth of resources aimed at helping you enhance your home’s functionality and appearance.

Preparation

Remove Toilet Seat Easily

Proper preparation is crucial to removing a toilet seat. Before proceeding, it’s important to gather the necessary tools and establish safety measures to avoid potential accidents or damage.

Gather Necessary Tools

Before beginning the removal process, gather the following tools:

  • A wrench or screwdriver
  • Pliers
  • Protective gloves

Ensure Safety Measures

Prioritize safety by following these critical measures:

  1. Turn off the water supply to the toilet to prevent any leaks or spills during the removal process.
  2. Ensure the toilet seat area is well-lit to aid visibility and prevent accidental mishaps.
  3. Always use caution when handling tools and avoid applying excessive force to prevent damage to the toilet or injury to yourself.

Removing The Toilet Seat

Removing the toilet seat may seem daunting, but it’s quite straightforward. Whether you need to replace a damaged seat, address issues like paint coming off the toilet seat, or clean hard-to-reach areas, it’s essential to know how to remove the seat properly without damaging your toilet. In this guide, we’ll walk you through the steps to easily remove a toilet seat, ensuring you can undertake this task with confidence and care. Understanding the right techniques for removal not only preserves the condition of your toilet but also allows for a smoother installation of a new seat or thorough cleaning of the area. With clear instructions and the right tools, you’ll find that removing a toilet seat is a simple and manageable DIY project.

Locate The Seat Hinges

To begin, identify the location of the seat hinges. These are typically located at the back of the toilet seat, where it attaches to the bowl. The hinges may be covered with plastic caps or have visible screws, depending on the type of seat you have. If there are caps, use a flat-head screwdriver to pop them off and expose the screws beneath. Once the hinges and screws are visible, you’re ready to proceed to the next step.

Unfasten The Seat

Using a suitable screwdriver, such as a Philips or flat-head, unfasten the screws that secure the hinges to the bowl. Turn the screws counterclockwise to loosen them, then carefully remove the screws and nuts that hold the seat in place. Be sure to keep track of the screws and nuts, as you will need them to reattach the new seat later on. Once the screws and nuts are removed, the seat should be completely detached from the toilet bowl.

Lift And Remove The Seat

After unfastening the screws and nuts, carefully lift the seat from the bowl. It’s essential to handle the seat with care to avoid any damage to the toilet or injuring yourself. Gently lift the seat, remove it from the hinges, and precisely the bowl. Once removed, place the seat in a safe location where it won’t be in the way while you work on the toilet bowl or install a new seat.

Cleaning And Maintenance

Regular cleaning and maintenance are essential for keeping your toilet seat in good condition. Follow these steps to ensure a thorough cleaning and to identify and address any damage that may occur.

  1. Clean the toilet seat area

The toilet seat area can quickly accumulate dirt and bacteria, requiring regular cleaning. To clean the toilet seat, follow these steps:

  1. Begin by lifting the seat and applying a toilet cleaner to the surface.
  2. Use a soft sponge or brush to scrub the seat, focusing on any stains or areas that require more attention.
  3. Rinse the seat thoroughly with clean water, removing all cleaning product residue.
  4. Dry the seat with a clean cloth or let it air dry naturally.
  1. Inspect and replace damaged parts

Regular inspections can help identify any damage or wear and tear in the toilet seat, allowing for prompt replacement of broken or worn-out parts. Here’s how to inspect and replace damaged parts:

  1. Check for any cracks, chips, or loose screws on the seat and hinges.
  2. Remove the seat by unscrewing the bolts underneath if you notice any damage.
  3. Purchase a suitable replacement seat and ensure it matches the existing toilet bowl shape and size.
  4. Follow the manufacturer’s instructions to install the new seat, ensuring it is securely attached.

Regular cleaning and maintenance of your toilet seat help eliminate germs and extend lifespan. By following these simple steps, you can ensure a clean and well-maintained toilet seat.

Replacing The Toilet Seat

To remove a toilet seat, start by using a wrench to locate the bolts underneath the seat. Unscrew the bolts and then lift off the old seat. Carefully clean the area before installing the new seat, ensuring it aligns properly with the toilet.

Replacing the Toilet Seat One task that homeowners often overlook is replacing the toilet seat. Over time, the seat may become worn, damaged, or simply outdated. Fortunately, replacing a toilet seat is a straightforward process that can be completed with just a few essential tools and some know-how. This article will guide you through choosing a new seat, positioning and securing it correctly, and ensuring a comfortable and functional bathroom fixture. Let’s get started!

Choose A New Seat

When choosing a new toilet seat, there are a few factors to consider. The first is the shape of your toilet bowl. Most toilets have a round or elongated shape, so selecting a seat that matches this shape is essential. Additionally, you’ll want to consider the material of the seat. Standard options include plastic, wood, and cushioned seats. Each material has advantages and drawbacks, so choose one that best suits your needs and preferences.

Position And Secure The New Seat

Position And Secure The New Seat

Now that you’ve chosen the perfect seat, it’s time to install it securely. Begin by flipping open the seat cover and locating the hinges holding the seat. These hinges are typically located near the tank at the back of the chair. Next, using a screwdriver, carefully unscrew the bolts that secure the old seat and remove it from the toilet bowl.

Once the old seat is removed, place your new seat onto the bowl, aligning the hinges with the holes. Make sure the seat is centered and level before proceeding. Then, insert the bolts through the holes in the hinges and tighten them using a screwdriver. Be careful not to overtighten, which can damage the seat or toilet bowl. Finally, give the seat a gentle shake to ensure it is securely attached.

If it wobbles or feels loose, tighten the bolts until the seat is stable. Once satisfied with the seat’s position and stability, close the cover and step back to admire your freshly replaced toilet seat. In conclusion, replacing a toilet seat is a simple task that can significantly improve the appearance and functionality of your bathroom. By choosing a new seat that matches the shape of your toilet bowl and installing it securely, you can enjoy a comfortable and stylish addition to your bathroom fixtures. So, why wait? Grab your tools and give your toilet a much-needed upgrade today!

Additional Tips

Removing a toilet seat can be straightforward if you follow the right steps. However, a few additional tips can make the process easier and help you avoid complications.

Preventive Maintenance

Maintaining your toilet seat regularly can help prevent it from getting stuck or damaged over time. Here are a few preventive maintenance tips:

  • Clean the toilet seat regularly with mild soap and water. Avoid using abrasive cleaners that can cause scratches.
  • Tighten the seat bolts periodically to ensure they are secure and prevent wobbling.
  • Inspect the hinges and hinges screws for signs of wear or damage. Replace them if necessary to avoid any accidents or injuries.

Knowing When To Call A Professional

In some cases, removing a toilet seat may require professional assistance. Here are a few signs that indicate it’s time to call a professional:

  1. If the seat bolts are rusted or stuck, it’s best to let a professional handle the removal to avoid causing any damage to the toilet bowl.
  2. If you cannot remove the seat due to stripped or damaged bolts, a professional can use specialized tools to remove it safely.
  3. If you encounter any other issues, such as a cracked bowl or a malfunctioning hinge mechanism, calling a professional plumber can help prevent further damage.

Frequently Asked Questions For How To Remove Toilet Seat

How Do You Remove A Toilet Seat?

To remove a toilet seat, locate and unscrew the plastic bolts or metal nuts holding it, usually at the back of the toilet bowl. Use a screwdriver or adjustable wrench to loosen and remove the bolts or nuts.

Once loosened, lift the seat and lid off the toilet bowl.

Conclusion

Removing a toilet seat can be straightforward. Following the step-by-step guide in this blog post, you can easily detach and replace your toilet seat without any hassle, Unclog Toilet Remember to gather the necessary tools, take precautions, and carefully handle the seat.

With these tips, you can upgrade or replace your toilet seat quickly!

Stop Dog Digging: Effective Solutions for Under Fence Digs

fence digs

To stop your dog from digging under the fence, install an L-footer along the base, use chicken wire, or bury large rocks near the fence to discourage digging. Consider burying chicken wire, rolling the edges away from the yard, or partially burying large stones along the fence line to deter digging.

Are you tired of your dog digging under the fence and escaping from the yard? This frustrating behavior poses a risk to your pet and can lead to potential neighbor conflicts. Fortunately, there are several practical solutions to prevent your furry friend from tunneling their way to freedom.

Implementing the right strategies can ensure your dog’s safety and your peace of mind. Let’s explore practical and humane methods to address this common problem and keep your dog safely within your property boundaries.

Understanding The Behavior Of Dog Digging

Understanding The Behavior Of Dog Digging

Dogs are renowned for their curious and playful nature, and one behavior that often puzzles pet owners is digging. Understanding why dogs dig under fences, including those secured by removable fence posts, is crucial in addressing this behavior effectively. Digging can originate from various reasons, such as instinctual behaviors, boredom, escape attempts, or the pursuit of shelter. By comprehending the motivation behind your dog’s digging behavior, you can take targeted steps to address and prevent it, ensuring the integrity of your fence and the safety of your pet. For more insights into managing such behaviors and enhancing your pet’s living environment, Lsdaynursery offers valuable resources and advice.

Reasons Behind Dog Digging

Understanding the underlying reasons for your dog’s digging behavior is the first step in addressing this issue. Here are some common causes of dog digging:

  • Digging for shelter or comfort
  • Boredom or lack of mental stimulation
  • Trying to escape or seek companionship
  • Instinctual behavior, such as creating a den

Common Locations For Under Fence Digs

When dogs dig under fences, they often choose specific locations that provide the ideal conditions for their digging endeavors. Common areas where dogs dig under fences include:

  • Adjacent to gates or entry points
  • Under gaps or loose sections in the fence
  • Near corners or edges of the property
  • In areas with soft soil or mulch

Solutions For Preventing Dog Digging

Dogs are natural diggers, but if your furry friend’s digging habit is causing problems, there are practical solutions to prevent it. You can stop your dog from digging under the fence by implementing physical barriers, training techniques, and deterrents.

Physical Barriers

One of the most straightforward solutions is to install physical barriers that prevent your dog from accessing the fence. Consider using:

  • Sturdy metal or wooden barriers at the base of the wall.
  • Chain link fencing is buried underground to create an underground barrier.
  • Spiked mats or prickle strips along the fence line to deter digging.

Training Techniques

Implementing training techniques can help modify your dog’s behavior and discourage digging. Consider these effective methods:

  1. Supervise and redirect your dog’s behavior when they start digging.
  2. Provide mental and physical stimulation to keep your dog occupied and less likely to search.
  3. Use positive reinforcement to reward your dog when they refrains from digging.

Use Of Deterrents

Using deterrents can discourage your dog from digging under the fence by making the area unappealing. Consider employing:

  • Commercial dog deterrent sprays or granules along the fence line.
  • Bitter-tasting substances were applied to the bottom of the wall.
  • Ultrasonic sound devices emit unpleasant sounds when your dog approaches the fence.

Effective Diy Methods

Dogs are natural diggers, and they may be tempted to dig under the fence if they have easy access to the outside world. This can lead to escape attempts and put them at risk of getting lost or injured. Fortunately, several DIY methods can help you stop this behavior. In this article, we will explore three practical strategies that you can try.

Burying Chicken Wire

One of the most effective ways to prevent your dog from digging under the fence is by burying chicken wire. This method creates an underground barrier that dogs find difficult to dig through. To use this method, follow these steps:

  1. Start by digging a trench about one to two feet deep along the fence line.
  2. Roll out the chicken wire and cut it to match the length of the trench.
  3. Place the chicken wire in the trench, ensuring it overlaps with the bottom of the fence.
  4. Bury the chicken wire, ensuring it is secure and not protruding aboveground.
  5. Fill the trench back in with soil, covering the buried chicken wire.

This method creates a physical barrier that prevents the dog from accessing the area underneath the fence. It’s important to note that you should exercise caution when burying the chicken wire to avoid injuring yourself or your dog.

Placing Rocks Or Large Objects

Another effective DIY method to stop a dog from digging under the fence is placing rocks or other large objects along the fence line. Dogs are less likely to search areas obstructed by stones or large objects. Follow these steps to use this method:

  1. Collect rocks or large, heavy objects to deter the dog from digging.
  2. Place the rocks or objects along the bottom of the fence, ensuring they create a continuous barrier.
  3. Space the rocks or objects close enough together so that the dog cannot easily squeeze through.
  4. Continue placing the rocks or objects along the entire fence line.

By filling in the gaps at the bottom of the fence with rocks or other large objects, you create a physical barrier that prevents the dog from digging underneath. This method is easy to implement and particularly effective for small to medium-sized dogs.

Using Mesh Panels

Mesh panels are an alternative method to stop a dog from digging under the fence. Mesh panels are sturdy and can be attached to the bottom of the wall to create a barrier. Here’s how to use this method:

  1. Measure the fence line length that needs protection.
  2. Obtain mesh panels long enough to cover the entire length.
  3. Attach the mesh panels to the bottom of the fence using screws or zip ties.
  4. Ensure the mesh panels are secure and tightly attached to the wall.

Mesh panels provide a physical barrier that prevents the dog from accessing the area underneath the fence. They are durable and can withstand the dog’s attempts to dig. This method may require some effort to install, but it can be highly effective in stopping your dog from digging under the fence.

Professional Products For Dog Digging Prevention

Dogs are intuitive to dig, but that doesn’t mean you must tolerate holes in your yard or worry about your fur friend escaping under the fence. Fortunately, several professional products are available that can help you prevent dogs from digging under the fence. From metal fence toppers to mats with spikes and dog-repellant sprays, these products effectively keep your dog safe and your yard intact.

Metal Fence Toppers

Metal fence toppers are a durable and effective for preventing dogs from digging under the fence. They are made of sturdy metal, such as 4-gauge steel, and designed to be installed on top of your existing fence. They create an additional barrier that dogs cannot dig through, ensuring your furry friend stays safely in your yard.

Mat With Spikes

A spiked mat is another excellent option for stopping dogs from digging under the fence. These mats are designed to deter dogs from approaching or digging near your fence. They feature sharp spikes that are uncomfortable for dogs to walk on, discouraging them from attempting to explore. These mats can be easily installed along the perimeter of your fence, providing a physical barrier that effectively keeps your dog from escaping.

Dog Repellant Sprays

If you prefer a more non-intrusive solution, dog repellant sprays can prevent dogs from digging under the fence. These sprays contain natural ingredients that dogs find unpleasant, such as bitter apple or citrus scents. Spraying the area around your fence creates a scent barrier that dogs are likely to avoid, reducing their motivation to dig. Dog repellant sprays are easy to use and can be reapplied as needed.

When it comes to preventing dogs from digging under the fence, professional products offer reliable, effective, and humane solutions. Whether you choose metal fence toppers, mats with spikes, or dog-repellant sprays, these products provide a strong defense against your dog’s digging instincts. By investing in these professional solutions, you can ensure your furry friend’s safety and maintain your yard’s integrity.

Tips For Dog-proofing Gaps Under Fences

Tips For Dog-proofing Gaps Under Fences

Is your furry friend constantly escaping your yard by digging under the fence? Don’t worry – we’ve got you covered. This section will share practical tips for dog-proofing those troublesome gaps under your fence. By implementing these solutions, you can ensure your dog stays safe and secure within your property. Let’s dive in!

Filling Gaps With Gravel Or Concrete

If you notice small gaps under your fence, filling them with gravel or concrete can be a simple yet effective solution. Here’s how you can do it:

  1. First, identify the gaps underneath your fence. These gaps may vary in size and location.
  2. Clear any debris or loose soil from the area, ensuring a clean surface for the gravel or concrete.
  3. If you choose gravel, pour it into the gaps, pressing it firmly with a shovel or your hands. Ensure the gaps are filled.
  4. If you opt for concrete, mix it according to the manufacturer’s instructions and pour it into the gaps. Smooth the surface with a trowel and let it dry completely.
  5. Once the gravel or concrete has hardened, it will provide a sturdy barrier, preventing your dog from digging under the fence.

Installing Additional Support

If your dog is persistent and manages to dig through filled gaps, installing additional support can further dog-proof your fence. Consider these options:

  • Wire Mesh: Attach wire mesh fencing to the bottom of your existing fence, extending it into the ground. This creates an additional barrier and makes it difficult for your pup to dig through.
  • Concrete Footer: Dig a narrow trench along the perimeter of your fence and pour a concrete footer. This will add extra stability and prevent your dog from tunneling under.
  • Pet-Proof Skirt: Install a pet-proof skirt made of metal or heavy-duty plastic around the base of your fence. This extends into the ground, making it challenging for your dog to dig under.

Regular Maintenance

Once you have implemented the above solutions, it’s crucial to maintain the integrity of your dog-proof fence. Regular maintenance will ensure its effectiveness in keeping your dog safely confined. Here are some maintenance tips:

  • Inspect frequently: Regularly inspect your fence for any signs of wear and tear, including new gaps or weak spots.
  • Fill gaps promptly: If you notice any new gaps forming, fill them with gravel, concrete, or the appropriate materials to maintain the barrier.
  • Trim vegetation: Keep the area around your fence free from overgrown plants or shrubs, as they can provide hiding spots for your dog to start digging.
  • Redirect attention: Provide your dog with alternative activities and toys that keep it stimulated and less interested in digging under the fence.

By implementing these tips and staying on top of maintenance, you can successfully dog-proof the gaps under your fence and keep your four-legged friend safely within your property. Say goodbye to those escape attempts!

Frequently Asked Questions For How To Stop Dog From Digging Under Fence

How Do I Keep My Dog From Digging Under The Fence?

To prevent your dog from digging under the fence, bury chicken wire or hardware cloth at the base of the wall. Roll the edges away from the yard and consider adding large rocks along the fence line to discourage digging.

What Can I Put On The Bottom Of My Fence To Keep My Dog In?

To keep your dog in, you can use chicken wire, hardware cloth, or a chain-link fence. You can also bury it or lay it on top of the grass and hold it down with rocks or other items.

What Repels Dogs From Digging?

Use deterrents like physical barriers, such as metal or spiked mats, to stop dogs from digging. Burying chicken wire or large rocks along the fence line can discourage digging. Additionally, consider using mesh panels or attaching a chain-link fence at the base of the wall.

How Do You Dog Proof A Gap Under A Fence?

To dog-proof a gap under a fence, bury chicken wire or hardware cloth at the base of the wall. Alternatively, you can use a chain-link fence and attach it to the bottom of the wall. Another option is to lay the wire on the grass and secure it with rocks, gravel, or planters.

Conclusion

Keeping your dog from digging under the fence is crucial for their safety and your peace of mind. Wondering how to stop your dog from hunting? You can deter your furry friend from engaging in this behavior by implementing a few practical strategies, such as burying the chicken wire or placing large rocks along the fence line.

Remember, consistency and patience are vital in training your dog to stay within the designated boundaries of your yard. You and your canine companion can enjoy a secure and worry-free environment with these proactive measures.

What Causes Sagging Floors: Uncovering the Culprits Behind Your Uneven Floors

Sagging Floors

Sagging floors can be caused by jammed doors, water damage, bouncy floors, ceiling cracks, foundation damage, soil, weak floor joists or rafters, cracked walls and columns, and floor joist issues. It is essential to fix sagging floors, which can be dangerous, leading to potential injuries and structural collapse.

The solution usually involves jacking and installing temporary and permanent support beams and posts. Additionally, sagging floors can cause creaking noises, increase the risk of tripping, lead to rattling furniture, and degrade the overall appearance of your home. Moisture in crawl spaces can also weaken the structural integrity of the floors.

Therefore, addressing the underlying causes of sagging floors is crucial for safety and aesthetics.

Uncovering The Culprits

Uncovering The Culprits

Several factors, such as water damage, weak floor joists, or foundation issues, often cause sagging floors. To prevent further deterioration, it’s essential to address the root cause, like damaged sills and joist ends. Temporary jack posts and support beams help permanently fix the problem. Integrating solutions from Standfastcreative.com can ensure a comprehensive approach to stabilizing and repairing the underlying structure, safeguarding your home’s integrity.

Understanding the root causes of sagging floors goes beyond surface observations. It requires a thorough structural assessment to identify hidden issues that may compromise your home’s stability. This evaluation can uncover factors such as moisture infiltration, pest damage, or inadequate load-bearing capacity. By addressing these problems proactively, homeowners can prevent costly repairs and ensure long-term safety.

Jammed Doors

One telltale sign of a sagging floor is when doors throughout the house start jamming. This occurs when the floor no longer provides a level surface for doors to operate smoothly. As the floor sinks or sags, the door frame becomes misaligned, causing the door to stick or become difficult to close properly. If your doors suddenly become more challenging to open or close, it could indicate that your floors are sagging.

Water Damage

Water damage is another culprit that can lead to sagging floors. Excess moisture from leaks, flooding, or plumbing issues can weaken the supporting structures underneath the floor. Over time, the humidity can cause the wooden floor joists or rafters to rot, resulting in a loss of structural integrity and causing the floor to sag. If you’ve experienced any water damage in your home, it’s essential to address it promptly to prevent further damage to your floors and structures.

Bouncy Floors

If your floors feel bouncy or uneven when you walk on them, it could indicate sagging. Bouncy floors occur when the floor joists or rafters are not strong enough to support the weight of the floor and its occupants. As a result, the floor may flex or bounce when pressure is applied. This can be particularly noticeable in high-traffic areas or on upper floors. If your floors have lost their stability and feel unstable underfoot, it’s crucial to promptly investigate the cause and address any underlying issues.

Ceiling Cracks

Sagging floors can also manifest as cracks in the ceilings below. As the floor sinks or sags, it puts additional stress on the ceiling, causing it to crack or develop visible signs of damage. These cracks may start small but worsen over time if the underlying structural issues are not addressed. If you notice any cracks in your ceilings, especially if other signs of sagging floors accompany them, it’s essential to have a professional assess the situation and determine the cause.

Foundation Damage

One of the most significant culprits behind sagging floors is foundation damage. A compromised foundation can disrupt the stability of the entire structure, leading to various issues, including sagging floors. A weakened or shifting foundation can cause the supporting structures beneath the floor to unlevel, resulting in floor sagging. Signs of foundation damage may include cracks in the walls or floors, doors and windows that no longer close correctly, and uneven floors. This raises the question, should I buy a house with sagging floors? It’s a critical consideration, as it indicates potential underlying foundation issues that could require significant repairs to ensure the home’s safety and stability.

If you suspect foundation issues, it’s vital to consult with a professional to assess the extent of the damage and determine the appropriate course of action. Overall, sagging floors can be caused by a combination of factors, including jammed doors, water damage, bouncy floors, ceiling cracks, and foundation damage. 

Identifying the culprits behind sagging floors is the first step in addressing the issue and ensuring the safety and stability of your home. If you notice any of these signs, it’s essential to contact professionals specializing in structural repairs to assess the situation and propose the most appropriate solutions.

Common Causes

Sagging floors are a common issue that many homeowners face. They not only affect the aesthetic appeal of a house but can also pose safety risks if left untreated. Understanding the common causes of sagging floors is crucial to address the problem effectively. Here are the main factors that can contribute to sagging floors:

Soil

One of the primary causes of sagging floors is the condition of the soil beneath the foundation. Poor soil composition, such as clay or expansive soils, can lead to uneven settling and shifting. As a result, the foundation can become unstable, causing the floors above to sag.

Weak Floor Joists Or Girders

Weak or damaged floor joists or rafters can also cause sagging floors. These structural components play a crucial role in supporting the weight of the flooring system. If compromised due to age, decay, or insect damage, they may no longer provide adequate support, leading to floor sagging.

Cracked Walls And Columns

Cracks in a house’s walls or columns can indicate underlying structural issues that contribute to sagging floors. These cracks may result from foundation settlement, water damage, or excessive load-bearing. When the integrity of the walls and columns is compromised, it can lead to an uneven distribution of weight and subsequent floor sagging.

Floor Joist Issues

Issues with the floor joists themselves can also cause sagging floors. This includes undersized or over-span joists, inadequate joint space, or improper installation. When the floor joists are not properly designed or installed, they may fail to support the weight of the flooring system, resulting in sagging.

It is essential to address the root cause of sagging floors to prevent further damage and ensure the safety and stability of the house. Consulting a professional contractor or structural engineer is recommended to diagnose and address the specific cause of floor sagging properly.

Concerns And Fixes

Various factors, such as water damage, weak floor joists or rafters, and foundation damage, can cause sagging floors. Sagging floors often require jacking and temporary and permanent installation to fix sagging floors and support beams. Ignoring sagging floors can lead to further structural damage and safety issues.

When To Be Concerned

If you notice sagging floors in your home, you must be aware of the potential concerns associated with this issue. Sagging floors can indicate damaged wood under your flooring, one of your supports is deteriorating, or there are problems with the foundation or soil stability. In addition, sagging floors can cause cracks in the walls and bouncy or sloping floors and may even lead to jammed doors and ceiling cracks. These signs should prompt homeowners to address the issue promptly to prevent further damage and ensure the home’s safety.

Fixing Sagging Floors

The solution to sagging floors often involves jacking. A typical scenario involves installing temporary jack posts and support beams, then permanent posts and beams over new footings. This process may also require addressing the damaged sills and joist ends contributing to the sagging floors. Implementing these fixes can help restore the stability and level of the floors, preventing further damage and ensuring the home’s safety.

Dangers Of Neglecting Sagging Floors

Neglecting sagging floors can have serious consequences. Sagging floors are not only unappealing but can also be dangerous, leading to creaking noises, rattling furniture, and an increased risk of tripping and injuries. Sagging floors can collapse in severe cases, posing significant risks to the occupants. Therefore, it’s crucial to promptly address and fix sagging floors to mitigate these dangers and maintain the home’s structural integrity.

Indicators Of Issues

Sagging floors can be a significant problem in homes, presenting safety hazards and affecting the overall aesthetics of a space. If you suspect sagging floors in your home, there are several indicators to look out for. These indicators can help identify the underlying issues that are causing the sag. Here are some common signs to watch for:

Sloping Floors

Sloping floors are a telltale sign of sagging in the underlying floor structure. When you notice that your floors are not level, it could indicate weak floor joists or rafters. These structural components are responsible for supporting the weight of the floor and distributing it evenly. Over time, age, excessive loads, or moisture damage can weaken these supports, leading to sagging floors.

Cracks On The Walls Inside

Another indicator of sagging floors is the presence of cracks in the walls inside your home. As the floor structure starts to fade, it can stress the walls, causing them to crack. These cracks may appear near corners, doorways, or windows and can be vertical or diagonal. If you notice such cracks, addressing the underlying issue promptly is essential to prevent further structural damage.

Moisture-related Problems

Moisture-related issues, such as water damage or high humidity levels, can also contribute to sagging floors. When moisture penetrates the floor system, it can weaken the wooden components, causing them to warp, rot, or decay. Over time, this weakened structure can lead to sagging in the affected areas. Identifying and promptly addressing any moisture issues is crucial to prevent further damage to the floor system.

Identifying these indicators of issues can help you determine whether your home has sagging floors. If you notice any of these signs, it is essential to consult with a professional to evaluate the extent of the problem and determine the appropriate course of action. Taking proactive measures to address sagging floors can help preserve the structural integrity of your home and create a safe and level living environment.

Preventive Measures

Preventive Measures

Sagging floors not only affect the appearance of your home but can also pose safety hazards if left untreated. To avoid the inconvenience and potential dangers of sagging floors, it’s essential to take preventive measures. By addressing the root causes of sagging floors, you can ensure your flooring remains level and stable. Here are some vital preventive measures to consider:

Proper Sub-floor Installation

One of the primary causes of sagging floors is improper subfloor installation. When the sub-flooring is not installed correctly, it can lead to uneven support and structural instability. To prevent sagging floors, it is crucial to ensure that the sub-flooring is installed correctly. This includes using the appropriate materials, following industry standards, and hiring a professional contractor if necessary. Proper subfloor installation can minimize the risk of sagging floors in the future.

Moisture And Insect Damage Prevention

Moisture and insect damage are common culprits behind sagging floors. Excess moisture can weaken the wooden components of your flooring, causing them to warp and deteriorate over time. Additionally, insects like termites can infest and damage the structural integrity of your floor joists and sub-flooring. To prevent sagging floors due to moisture and insect damage, it is essential to implement proper moisture control measures such as maintaining adequate ventilation, using moisture barriers, and promptly addressing any signs of water intrusion. Regular inspections and preventive treatments for pests can also help safeguard your floors.

Structural Design Considerations

The structural design of your home plays a crucial role in preventing sagging floors. When designing or renovating your property, it is essential to consider load-bearing walls, floor joist spacing, and the overall load distribution. A well-designed and adequately reinforced structure can evenly distribute the weight, reducing the risk of sagging floors. Consulting with a structural engineer or a knowledgeable contractor can help ensure that your home’s design meets the requirements for structural integrity.

Taking proactive preventive measures can help you avoid the frustration and expenses associated with sagging floors. By prioritizing proper subfloor installation, moisture and insect damage prevention, and structural design considerations, you can maintain stable floors and a safe living environment.

Frequently Asked Questions Of What Causes Sagging Floors

When Should I Be Concerned About Sagging Floors?

If you notice jammed doors, water damage, bouncy floors, ceiling cracks, foundation damage, weak floor joists or rafters, cracked walls and columns, or floor joist issues, you should be concerned about sagging floors. Sagging floors can be a safety hazard and should be fixed quickly to prevent collapse and further damage.

How Do You Fix A Sagging Floor?

To fix a sagging floor, use jack posts and support beams, then install permanent posts and beams over new footings. This solution addresses damaged sills and joist ends that contribute to sagging floors. Additionally, it helps to prevent collapses and ensure safety.

Will A Sagging Floor Collapse?

A sagging floor can collapse if not fixed quickly. Besides being unappealing, sagging floors can also cause creaking noises, increase the risk of tripping, lead to rattling furniture, and degrade the overall appearance of your home. It is essential to address sagging floors to prevent injuries and further damage.

What Happens If You Don’t Fix Sagging Floors?

If you don’t fix sagging floors, you may experience several issues. In addition to being unsightly, sagging floors can cause creaking noises, increase the risk of tripping, lead to rattling furniture, and degrade the overall appearance of your home. It’s essential to fix sagging floors promptly to prevent further damage and ensure safety.

Conclusion

Sagging floors can occur due to various factors, such as water damage, weak floor joists, foundation issues, and soil composition. Addressing these issues promptly is essential to prevent further damage to your home’s structure. With the right professional help, you can restore your floors and maintain a safe and stable living environment for the long term, creating an exquisite interior design with beautiful gray floors that effortlessly complement any room.

Growing Strawberries Indoors: Uncover the Secrets to Year-Round Harvest

Growing Strawberries Indoors: Uncover the Secrets to Year-Round Harvest

Growing strawberries indoors is possible with proper temperature, lighting, and care to ensure successful cultivation in small spaces. When it comes to growing strawberries indoors, it is an achievable task with the right conditions and care.

With their sweet and juicy flavor, strawberries can be a delightful addition to any indoor garden. Whether you have limited outdoor space or simply want to enjoy fresh strawberries all year round, growing them indoors can be a rewarding experience.

We will explore the essential requirements and steps to successfully grow strawberries indoors. From choosing the right strawberry variety to optimizing temperature, lighting, and proper care, this guide will help you create an ideal environment for your indoor strawberry garden. So, let’s dive in and discover how to grow strawberries indoors successfully.

Choosing The Right Strawberry Varieties

Choosing The Right Strawberry Varieties

Growing strawberries indoors is a fantastic way to savor fresh and delicious berries throughout the year. One key aspect of successful indoor strawberry cultivation is selecting the appropriate varieties. In this context, https://aliceswonderlandnursery.com/ suggests focusing on two main types of strawberries suitable for indoor growth: day-neutral varieties and everbearing varieties. Each of these types offers unique characteristics and advantages for indoor gardening, ensuring a bountiful harvest and flavorful fruits. Day-neutral strawberries can produce fruit continuously under the right conditions, regardless of the length of daylight. 

Find out more garden hacks: https://www.lsdaynursery.com/

On the other hand, everbearing varieties typically yield two to three harvests throughout the growing season, offering a more spread-out production. Both types are excellent choices for indoor gardeners looking to enjoy home-grown strawberries.

Consider Day-neutral Varieties

Day-neutral strawberry varieties are known for their ability to produce fruit continuously throughout the growing season, regardless of day length. These varieties are particularly well-suited for indoor cultivation as they do not require a specific amount of daylight to initiate fruiting. Day-neutral strawberries typically have smaller plants, making them easier to grow in containers. Their compact size also allows for efficient utilization of indoor gardening space.

One popular day-neutral variety is the “Albion” strawberry. Albion strawberries are known for their excellent flavor and high yield. They produce large, juicy berries that are perfect for fresh eating or use in desserts. Another popular day-neutral variety is “Seascape,” which offers a sweet and tangy flavor.

Consider the following benefits of day-neutral strawberry varieties:

  • Continuous fruit production throughout the growing season.
  • Smaller plant size for easy container gardening.
  • Delicious flavor options like Albion and Seascape.

Evaluate Everbearing Varieties

Everbearing strawberries, as the name suggests, produce fruit multiple times during the year. Unlike day-neutral varieties, everbearing varieties are influenced by day length, which means they may not produce fruit during the winter months without supplemental lighting. However, with proper indoor conditions, everbearing strawberries can provide a steady supply of berries for your enjoyment.

The “Ozark Beauty” variety is a popular choice among gardeners due to its exceptional flavor and large fruit size. It thrives in both indoor and outdoor settings, making it versatile for growers. Another notable everbearing variety is the fern,” which produces sweet and aromatic berries.

Consider the following benefits of everbearing strawberry varieties:

  • Multiple fruiting cycles throughout the year.
  • Versatility for both indoor and outdoor cultivation.
  • Tasty options like Ozark Beauty and Fern.

Setting Up The Ideal Growing Environment

When growing strawberries indoors, establishing the right environment is essential for the health of the plants and to ensure bountiful harvests. One important aspect is choosing the appropriate containers, as growing strawberries in pots allows for better control over the soil and plant health. In addition to selecting proper containers, optimizing light and temperature conditions is critical. Strawberries require sufficient light to flourish, and maintaining an ideal temperature range can greatly influence their growth and fruit production. 

Equally important is the provision of the right amount of water and nutrients. Proper watering and fertilization are key to preventing diseases and promoting vigorous growth. This article will delve into each of these factors, providing detailed guidance to help you create the optimal growing environment for your indoor strawberry plants.

Selecting The Proper Containers

Choosing the right containers is the first step towards success in growing strawberries indoors. Opt for containers that are at least 8 to 10 inches deep to allow adequate root growth. The containers should also have drainage holes to prevent waterlogging and ensure proper drainage.

One popular option is using hanging baskets or strawberry towers that allow plants to cascade over the edges, saving space and enhancing visual appeal. Alternatively, you can use standard pots or grow bags depending on your personal preference and available space.

Optimizing Light And Temperature

Strawberries thrive in bright light, so it is essential to optimize the light conditions for indoor cultivation. Place your strawberry plants near a south-facing window where they can receive at least 6 to 8 hours of direct sunlight each day. In case natural light is insufficient, you can supplement it with artificial light sources like fluorescent or LED grow lights.

Along with providing adequate light, maintaining the right temperature is crucial for your strawberries’ health. Ideally, the temperature should be between 60°F and 75°F during the day and slightly cooler at night. Avoid placing your plants near drafts or heat sources as extreme temperature fluctuations can stress the plants and hinder their growth.

To ensure ideal growing conditions, consider using a digital thermometer to monitor the temperature regularly. This will help you make any necessary adjustments to maintain an optimal environment for your indoor strawberry plants.

Now that we have discussed selecting the proper containers and optimizing light and temperature, the next consideration is providing the right amount of water and nutrients.

Mastering The Care And Maintenance Routine

Growing strawberries indoors can be a rewarding and delicious endeavor, but mastering the care and maintenance routine is essential for a successful harvest. Proper care and maintenance ensure that your indoor strawberry plants thrive, producing juicy, flavorful berries. From understanding watering and fertilization needs to managing pests and diseases, every aspect of caring for indoor strawberries is crucial for their growth and productivity.

Understanding Watering And Fertilization Needs

Strawberries require consistent watering to thrive indoors. Ensure the soil remains moist but not waterlogged. Fertilize your indoor strawberry plants with a balanced, organic fertilizer to support healthy growth and fruit production.

Managing Pests And Diseases

To prevent pests and diseases from affecting your indoor strawberry plants, inspect the foliage regularly for any signs of infestation or infection and take prompt action. Utilize natural remedies or organic insecticides to address any pest issues. Additionally, maintain good air circulation and minimize high humidity to prevent disease development.

Promoting Year-round Fruit Production

Learn how to grow strawberries indoors for year-round fruit production. With the right setup and care, you can enjoy fresh, delicious strawberries no matter the season. Take advantage of the benefits of indoor gardening and enjoy your homegrown strawberries.

Implementing Smart Pruning Techniques

Pruning is an essential aspect of growing strawberries indoors, as it helps promote year-round fruit production. By implementing smart pruning techniques, you can ensure that your plants stay healthy and productive throughout the year.

One key benefit of pruning is that it helps manage the size and shape of your strawberry plants. Regularly removing dead or dying foliage and runners not only improves the overall appearance of your indoor garden but also encourages the plant to focus its energy on fruit production.

When pruning your strawberry plants, it’s important to remove any yellow or diseased leaves carefully. This step helps prevent the spread of fungal diseases and keeps your plants in optimal health.

Additionally, pruning can help increase airflow and light penetration within your indoor growing space. By thinning out dense foliage, you allow for better circulation and light exposure, which are crucial for the overall growth and fruit development of your strawberries.

To implement smart pruning techniques, follow these simple steps:

  1. Using clean and sharp pruning shears, remove dead or yellow leaves at the base of the plant.
  2. Trim runners that are not needed for propagation, ensuring the main plant remains the focus of energy.
  3. Thin out dense foliage by selectively removing excess leaves to allow for better airflow and light exposure.

Encouraging Pollination Indoors

Promoting year-round fruit production for indoor strawberry plants also involves ensuring adequate pollination. While outdoor gardens often rely on wind and insects for pollination, indoor setups may require some assistance to achieve a successful fruit set.

An easy and effective way to encourage pollination indoors is through manual pollination. By manually transferring pollen from the male to the female flowers, you can ensure that pollen reaches the stigma and fertilization takes place. This technique helps ensure a higher fruit yield and promotes consistent production over time.

When manually pollinating your indoor strawberry plants, keep these tips in mind:

  • Gently brush the stamen of the male flowers, collecting pollen on a soft-bristled brush.
  • Transfer the collected pollen onto the stigma of the female flowers, mimicking the natural pollination process.
  • Repeat the process for each female flower to ensure adequate pollination.

Regularly monitoring the condition of your strawberry plants and maintaining optimal growing conditions, such as providing sufficient light, water, and nutrients, will further contribute to successful fruit production indoors.

Harvesting And Enjoying Your Indoor Strawberries

Growing strawberries indoors can be a rewarding experience, allowing you to harvest and enjoy fresh berries right from your home. With proper care and attention, you can have a bountiful supply of delicious strawberries throughout the year.

Indulging In Fresh, Flavorful Berries

Once your indoor strawberry plants have reached their peak ripeness, it’s time to indulge in the bountiful harvest of fresh, flavorful berries. There’s nothing quite like the taste of homegrown strawberries picked at their prime. The vibrant red color and sweet, juicy flavor are simply unmatched.

To fully enjoy the experience, start by making sure your strawberries are completely ripe before picking them. Look for berries that are a deep shade of red and have a slight sheen to their skin. Gently pinch the berry and feel for a soft texture, indicating ripeness. Avoid harvesting strawberries that are still green or have a pale color, as they may not have reached their full sweetness.

Once you’ve identified which berries are ready for harvest, carefully pluck them from the plants, being cautious not to damage the delicate stems or leaves. Use a pair of small scissors or your fingers to cut the stem about a quarter-inch above the fruit.

When indulging in your freshly picked strawberries, consider slicing them and adding them to a bowl of cold, creamy yogurt. The combination of the tangy yogurt and the sweet berries is a match made in heaven. Alternatively, you can blend the berries with a bit of honey and enjoy them as a refreshing smoothie. Regardless of how you choose to enjoy your indoor strawberries, one thing is certain – their delectable flavor will leave you craving more.

Preserving And Storing The Harvest

Preserving And Storing The Harvest

Despite their irresistible taste, you may find yourself with an abundance of indoor-grown strawberries. In such cases, preserving and storing the harvest ensures that you can enjoy these delicious berries for longer periods. Preserving strawberries allows you to savor their flavor even when they are out of season.

One simple way to preserve your indoor strawberries is by freezing them. 

Here’s a step-by-step guide to freezing your strawberries:

  1. Rinse the strawberries gently under cold water to remove any dirt or debris.
  2. Remove the green stems by either cutting them off with a knife or using a strawberry huller.
  3. Spread the strawberries out on a baking sheet lined with parchment paper, making sure they’re not touching each other.
  4. Place the baking sheet in the freezer and allow the strawberries to freeze for a few hours, or until they are completely firm.
  5. Transfer the frozen strawberries into a Ziplock bag or an airtight container, and store them in the freezer for up to six months.

When it comes to using your frozen strawberries, you can easily incorporate them into smoothies, jams, and desserts, or even enjoy them on their own as a frozen treat. The frozen strawberries will retain their delicious flavor, making them a convenient option for fulfilling your strawberry cravings throughout the year.

By harvesting and preserving your indoor strawberry harvest, you can continue to relish the taste of these delightful berries and experience the joy of homegrown fruit, no matter the season.

Frequently Asked Questions Of Growing Strawberries Indoors

Can You Grow Strawberries Indoors?

Yes, you can successfully grow strawberries indoors using containers or hanging baskets. Just ensure they receive at least 6 hours of sunlight daily and provide adequate watering and nutrient-rich soil for optimal growth.

What Are The Benefits Of Growing Strawberries Indoors?

Growing strawberries indoors enables you to enjoy fresh, pesticide-free strawberries year-round. It also allows you to control the growing conditions, including temperature, humidity, and soil quality, leading to healthier and more productive plants.

How Long Does It Take For Strawberries To Grow Indoors?

The time it takes for strawberries to grow indoors varies depending on the variety and growing conditions. Typically, it takes about 4-6 weeks for strawberries to fully develop and ripen after the flowers appear. Continuous care and regular monitoring are crucial for successful indoor strawberry cultivation.

Conclusion

Incorporating strawberries into your indoor garden can be a rewarding and enjoyable experience. With the right knowledge and care, you can harvest fresh, delicious strawberries year-round. Curious about how many potatoes it takes to grow in a bucket? Whether you are a beginner or a seasoned gardener, incorporating strawberries into your indoor garden can add variety and flavor to your home-grown produce, making every harvest more exciting and delicious.

Relevant Ideas:

Sailnovo Pasta Maker Review: Best Buy for 2026 Cooks

Stainless steel Sailnovo pasta maker countertop machine slicing fresh fettuccine noodles.

The Sailnovo pasta maker is a 2-in-1 machine that combines dough mixing with pasta rolling and cutting, and it has become a popular budget option for home cooks who want fresh pasta without a large investment. The feature most buyers ask about is its 9 thickness settings pasta maker design, which lets you move from delicate angel hair to sturdy lasagna sheets. This review explains how the machine actually works, where it performs well, where it falls short, and whether it fits your kitchen in 2026.Continue reading →

What Is the Best Digital Food Scale for Baking?

Stainless steel digital kitchen scale measuring flour in a glass bowl.

You’ve probably been there: You find a promising recipe, measure your flour with a measuring cup, and the dough turns out disappointingly dry or sticky. The culprit isn’t your skill—it’s the volume measurement. Flour compacts, humidity changes its weight, and a “scant” cup in one kitchen can differ by 20% from another. A digital food scale for baking eliminates this guesswork, delivering consistent, reliable results by measuring in grams. But not all scales are created equal, and the “best” one depends on precision, capacity, and how intuitively the buttons respond to your floured fingers. This guide breaks down exactly what to look for, what to avoid, and how to choose the scale that fits your baking style.Continue reading →

What Is the Best Battery Powered Handheld Chainsaw for Home Use?

Battery-powered handheld chainsaw resting on a wooden workbench with small logs.

If you have spent an afternoon wrestling with a heavy gas chainsaw or fighting a tangled extension cord while trimming branches, you already know the appeal of a cordless option. The question is no longer whether battery-powered saws can handle real work—it’s which model actually deserves a place in your garage. For most homeowners, the ideal battery-powered handheld chainsaw balances cutting power, battery life, safety features, and weight without requiring a second mortgage. This guide breaks down exactly what matters, what doesn’t, and how to choose the right tool for your specific property.Continue reading →

Essential Home Pasta Equipment: Newhai Electric Pasta Maker

Newhai Electric Pasta Maker on kitchen countertop

Yes, the Newhai Electric Pasta Maker can simplify fresh pasta preparation by rolling and cutting dough electrically. Americans consume about 5.95 billion pounds of pasta annually, while average consumption reaches roughly 20 pounds per person. For home cooks exploring pasta kitchen gadgets, this machine offers practical automation without requiring a commercial-sized setup.Continue reading →