
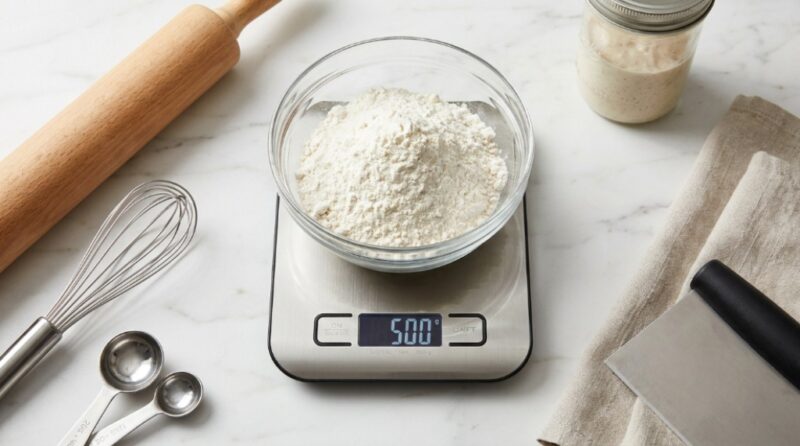
You’ve probably been there: You find a promising recipe, measure your flour with a measuring cup, and the dough turns out disappointingly dry or sticky. The culprit isn’t your skill—it’s the volume measurement. Flour compacts, humidity changes its weight, and a “scant” cup in one kitchen can differ by 20% from another. A digital food scale for baking eliminates this guesswork, delivering consistent, reliable results by measuring in grams. But not all scales are created equal, and the “best” one depends on precision, capacity, and how intuitively the buttons respond to your floured fingers. This guide breaks down exactly what to look for, what to avoid, and how to choose the scale that fits your baking style.
Key Takeaways
- Weighing ingredients in grams is significantly more accurate than measuring by volume, especially for flour and leavening agents.
- Look for a scale with 1-gram precision (or 0.1g for yeast and spices) and a capacity of at least 5 kilograms (11 pounds) for dough and large batches.
- Bowl-mode (tare) functionality is non-negotiable for efficient baking; you must be able to zero out the weight of your mixing bowl.
- Consider unit switching (g, oz, lb/oz, ml) and display readability, as small screens can be hard to read when you are looking down from standing height.
Why Bakers Are Ditching Measuring Cups

Professional pastry chefs rarely use measuring cups. There is a good reason for that. When you scoop flour, you trap air pockets. When you dip the cup into the bag, you compact the flour. A cup of all-purpose flour can weigh anywhere between 120 and 150 grams depending on the method. If a recipe calls for 300 grams of flour and you use a dense cup, you are adding over 20% more flour than intended. This throws off hydration ratios, making bread too stiff or cakes too dense.
Using a scale forces consistency. It turns baking from a guessing game into an exact science. It also reduces cleanup because you can add all your dry ingredients directly into one mixing bowl on a scale, hitting tare to zero out after each addition. This “one-bowl” method saves time and reduces dishes, which is a compelling reason to adopt weighing as your standard practice.
Critical Features to Evaluate Before Buying
Every scale on the market claims to be accurate, but the materials, software, and physical design vary wildly. Here is what separates a kitchen tool that lasts ten years from one that breaks after a season of heavy bread making.
Precision and Measurement Increments
For general baking, you need a scale that measures in 1-gram increments. If you are working with small amounts of salt, instant yeast, or baking powder—ingredients measured in single digits—a scale that only tracks in 5-gram steps is too coarse.
If you consistently bake sourdough or work with delicate spices, look for a scale with 0.1-gram precision. However, these highly sensitive scales often have a lower maximum weight (often around 500 grams), so they aren’t practical for weighing a heavy Dutch oven or a large batch of pizza dough.
Weight Capacity
Think about the heaviest thing you will put on the scale. Not just the flour, but the mixing bowl, the dough, and the water combined. A standard capacity is 5 kilograms (about 11 pounds). If you are mixing a double batch of bread or using a heavy glass mixing bowl, 5kg is usually sufficient. If you are making large batches for a small bakery or canning, look for capacity closer to 10kg, though these models sacrifice fine precision.
Display Readability
This is an often-overlooked frustration. If you bake while standing at a counter, the scale sits on the counter while you read it from above. Many scales have flat LCD screens that are virtually impossible to read from this angle—they look like a dark gray blur until you crouch down to eye level. Look for a scale with a “lift-up” or angled display, or one with a raised backlit screen that you can read from a standing position. This small detail makes a huge difference to daily usability.
Material and Build Quality
Scales take a beating. Flour dust gets into buttons, water splashes, and sticky dough gets smeared on the weighing platform. If you are investing in a tool, you want it to survive the environment of a busy kitchen. The choice between plastic and stainless steel isn’t just about looks; it impacts hygiene and stability.
Stainless Steel vs. Plastic
Stainless steel surfaces are generally easier to wipe down and don’t absorb odor or grease. They are resistant to staining from turmeric, saffron, or tomato paste. However, not all “stainless steel” scales are fully steel—many are plastic bodies with a thin steel top layer. Make sure the platform itself is thick enough not to flex.
Plastic models are lighter and often cheaper, but they tend to absorb grease into porous surfaces over time. More importantly, cheap plastic scales can feel wobbly. To get an accurate reading, the sensor needs a stable base. If the scale rocks on your countertop, the sensor will give inconsistent numbers.
The Interface and Buttons
Baking requires you to be messy. Think about pressing buttons with flour-covered fingers. The best scales use sealed silicone buttons or touch controls that don’t allow debris to fall into the mechanism. If you choose a scale with recessed buttons, prepare to spend time cleaning them out with a toothpick to prevent them from sticking. Look for models with a “zero” or “tare” button that is larger and clearly separated from the “mode” or “unit” button to avoid accidental presses.
If you are looking for a balance between affordability and functionality, you may find that a reliable Etekcity model offers the precision and polished design necessary to elevate your baking. For those seeking a cost-effective option that doesn’t compromise on essential features, you can explore this specific digital food scale for baking that fits the criteria for accuracy and easy storage.
How to Use a Scale for Perfect Dough
Switching to weight measurements requires a slight adjustment in your workflow, but the process is simple. The goal is to learn to mix directly in the bowl on the scale, reducing the number of dishes and ensuring everything is precisely measured.
- Place your bowl on the scale and turn it on. It should read 0 grams with the empty bowl’s weight already factored out.
- Add your first ingredient (e.g., flour) until you hit the target weight.
- Press “Tare” (or “Zero”). The display will reset to 0. Now you can add water without having to subtract the flour weight mentally.
- Repeat with sugar, salt, and butter.
- Add ingredients slowly when you get close to your target number to avoid overshooting. It is much easier to add a pinch than to remove an extra 5 grams of flour already mixed into your batter.
Understanding Tare, Units, and Auto-Off
There are a few functions that seem straightforward but often confuse new users of digital scales. Understanding these will help you operate any model you buy efficiently.
Measuring Liquids in Milliliters
Most scales have a “ml” or “fluid ounce” function. This is useful, but only for water. Due to density differences, 100 ml of honey weighs significantly more than 100 ml of water. Using the “ml” setting to measure honey will give you an incorrect amount. For wet ingredients that are not water, rely on the gram setting and look up the specific density, or use a liquid measuring cup instead.
The Auto-Off Function
While a scale may get you out of the kitchen, auto-off is a common irritation. Many budget scales shut down after two minutes of inactivity to save battery. This is fine until you are mid-recipe, step away to check your oven, and come back to find your scale switched off and your measurements lost. If you often bake with multiple interruptions, look for a scale with a long auto-off timer (around 5 minutes) or one that allows you to disable the feature entirely.
Comparing Smart Scales vs. Standard Scales
The market has seen a rise in “smart” scales that connect to an app via Bluetooth. These scales guide you through recipes on a phone screen, showing you “add 50 grams of sugar” and confirming your pour. While these are fantastic for beginners, they have trade-offs that serious bakers should consider.
| Feature | Standard Digital Scale | Smart Bluetooth Scale |
|---|---|---|
| Battery Life | Months of use on standard AAA batteries | Often shorter due to wireless connectivity; requires charging |
| Dependency | Works independently forever | Often requires the app to unlock recipe features; becomes obsolete if app support stops |
| Ease of Use | Press button, weigh, done | Requires phone setup, pairing, and app navigation while your hands are covered in butter |
| Precision | Consistently accurate for baking | Accuracy varies, but generally the same as standard; the “smart” parts don’t improve sensor quality |
For most home bakers, a standard scale without Bluetooth is superior. It is faster to use and doesn’t rely on an external ecosystem. The “smart” features are often a solution looking for a problem—the primary goal is simply accurate weight measurement.
Common Mistakes When Weighing Ingredients
Even with a top-tier scale, there are habits that can ruin your measurements without you realizing it. Here are the most frequent errors seen in home kitchens:
- Weighing the flour directly from the bag: When you pour from a heavy 5lb flour bag, it is difficult to stop the flow quickly. You will often overshoot. Instead, spoon flour into the bowl gently or use a smaller scoop to gradually approach the target weight.
- Forgetting to re-tare after moving the scale: If your scale is on a wooden board that shifts, the zero point can drift. Always verify the scale is at zero before adding the next ingredient.
- Using the scale on an uneven surface: A towel or a warped cutting board under the scale will cause inaccurate readings. Set it on a flat, hard ceramic or granite countertop for the best results.
- Ignoring the condensation: If you weigh hot ingredients directly, the steam can damage the sensor over time. Allow hot caramel or melted chocolate to cool slightly before weighing,
To upgrade your kitchen setup and expand your culinary toolkit beyond precision measuring, read our guide on Essential Home Pasta Equipment.
Frequently Asked Questions
Is 1 gram or 0.1 gram accuracy better for baking?
For 90% of baking, 1 gram accuracy is sufficient. However, if you bake sourdough regularly and need to precisely measure 5 grams of salt, the 1g accuracy is fine. You only need 0.1g accuracy when working with specialty items like yeast for starters in tiny quantities, or if you are measuring expensive spices like saffron.
Can I use a scale to measure flour without a measuring cup?
Yes. This is the primary purpose of the scale. Instead of scooping, place your bowl on the scale, tare it to zero, and pour the flour directly in until the scale shows the required grams. This prevents packing and ensures an exact weight every time.
Why does my digital scale keep turning off while I bake?
This is usually a power-saving feature called “auto-off.” It activates after a set period of inactivity (usually 1–3 minutes). It assumes the scale is idle. To prevent this, keep the ingredients moving, or look for a scale model that has an option to disable the auto-off feature.
How do I clean a digital kitchen scale without breaking it?
Never submerge the scale in water. The sensors are located inside the housing. Instead, unplug it or remove the batteries, wipe the platform with a damp cloth, and use a cotton swab with rubbing alcohol to clean the crevices around buttons. For stubborn dough, let it dry and brush it off.
Does the weight capacity matter if I only weigh small amounts of flour?
Yes. If you are baking bread, you often mix water, flour, and salt in the same large bowl. A heavy ceramic bowl can weigh 1.5 kilograms on its own. If you have a scale with only a 2kg capacity, you can only add .5kg of ingredients before maxing out the sensor. For bread and pastry, opt for a 5kg capacity to accommodate the bowl plus the ingredients.
What is the difference between measuring on a scale and measuring liquids on a jug?
Weighing is more accurate for dry goods because volume changes with humidity and compaction. For liquids, a standard Pyrex jug with clear markings is also very accurate, but a scale is more accurate for viscous liquids like honey or molasses, which are difficult to pour cleanly to the correct line without air bubbles.
Conclusion
The best digital food scale for baking is one that disappears into your workflow—it should be accurate, dependable, and readable without causing fuss. Prioritize a model with 1g precision, a 5kg capacity, and a display you can read from a standing height. Avoid the trap of purchasing scales with smart features you won’t use or plastic bodies that will stain. A good scale is an investment in your craft; it is the single most effective upgrade you can make to your equipment after your oven. Choose a model that feels sturdy, clean it carefully, and get ready to enjoy baking with the same precision as the professionals.
